

What this guide covers (quick map)
- Why check NVMe health and what to expect
- Tools you’ll use (nvme-cli, smartctl/smartmontools, GNOME Disks) — which to pick and why
- Step-by-step: find the device, read SMART (nvme-cli), interpret the necessary fields
- Alternative: use
smartctland the Disks GUI (how and why) - Self-tests, logs, and continuous monitoring (smartd/systemd)
- Firmware updates, manufacturer utilities, and safe maintenance tips
- Troubleshooting common issues and a final checklist
1. Why check NVMe health (short answer)
NVMe SSDs are fast and reliable, but like all storage they wear over time. SMART (Self-Monitoring, Analysis, and Reporting Technology) exposed by NVMe controllers reports controller warnings, temperature, the percentage of life used, media errors, and read/write counters. Reading these regularly helps you spot early wear or errors so you can back up data and plan replacements. The standard low-level tool for NVMe on Linux is nvme-cli; smartctl from smartmontools is a longer-standing SMART tool that also supports NVMe. Ubuntu’s Disks app gives a friendly GUI view for quick checks. (NVM Express)
2. Tools & installation
Recommended primary tool: nvme-cli (most complete NVMe info)
nvme-cli communicates with NVMe controllers and exposes NVMe-specific log pages (like the SMART log) in a vendor-neutral way. Install it and you’ll be able to run nvme list, nvme smart-log, nvme id-ctrl, and more.
Install:
sudo apt update
sudo apt install nvme-cli
Alternative/additional: smartmontools / smartctl
smartctl is useful because it presents SMART output in a familiar format (smartctl -a) and supports scheduled tests via smartd. NVMe support exists and is widely used, although historically it was added later than SATA support — use it as a complementary tool. (Smartmontools)
Install:
sudo apt install smartmontools
GUI: GNOME Disks ("Disks" / gnome-disk-utility)
Good for quick checks and running self-tests when you prefer not to use the terminal. If you don’t have it:
sudo apt install gnome-disk-utility
Open “Disks” from the Activities menu to view SMART data and run self-tests. (Ubuntu Help)
3. Identify your NVMe device
Before you run checks, find the device path.
Using nvme-cli:
sudo nvme list
Example output (abbreviated):
Node             SN                Model                        Namespace Usage
/dev/nvme0n1     E200M00...        KINGSTON...                  1         2,000.2  GB / 2,000.2 GB
Device node you’ll use for nvme-cli commands is typically /dev/nvme0 (controller) and /dev/nvme0n1 (namespace / block device). Use /dev/nvme0n1 when mounting/partitioning, but nvme smart-log works against the controller path (e.g. /dev/nvme0). The nvme list result tells you the exact nodes.
You can also check with:
lsblk -o NAME,MODEL,SIZE
4. Method A (recommended): read SMART with nvme-cli
A.1 Read the SMART log (human readable)
Use the controller device (/dev/nvme0 — not the namespace path) for nvme smart-log:
sudo nvme smart-log /dev/nvme0
Typical output (annotated):
critical_warning                    : 0
temperature                         : 36 C
available_spare                     : 100
available_spare_threshold           : 10
percentage_used                     : 1
data_units_read                     : 12345
data_units_written                  : 67890
host_read_commands                  : 98765
host_write_commands                 : 54321
controller_busy_time                : 0
power_cycles                        : 12
power_on_hours                      : 234
unsafe_shutdowns                    : 0
media_errors                        : 0
num_err_log_entries                 : 0
A.2 How to interpret the key fields
- critical_warning: 0 = OK. Any non-zero value signals a controller warning (temperature or reliability). If non-zero, stop and investigate immediately.
- percentage_used: Wear indicator (manufacturer dependent).
0means essentially brand new;100usually indicates the rated endurance has been reached. This is a primary wear metric. - temperature: Reported in °C. Keep sustained temps below recommended limits (generally below ~70°C for consumer NVMe, but check your SSD's datasheet).
- available_spare / available_spare_threshold: Spare pool remaining. If available_spare <= threshold, replacement is recommended.
- media_errors and num_err_log_entries: Non-zero values mean controller detected read/write/other errors — important red flags.
- data_units_written/read: Units are in 512,000-byte blocks or controller-specific units (nvme spec uses 512 KiB or 512,000 bytes units historically) — combined with drive documentation you can estimate TBW.
- power_on_hours / power_cycles / unsafe_shutdowns: Helps calculate usage patterns and correlate with errors.
If any of these show alarming values (critical_warning != 0, percentage_used high, media_errors > 0) back up immediately and consider replacement. The NVMe SMART log format and semantics come from the NVMe specification and nvme-cli presents them in readable form. (Debian Manpages)
A.3 Save the raw SMART log (for support)
sudo nvme smart-log /dev/nvme0 --output-format=json > nvme0_smart.json
Or raw binary:
sudo nvme smart-log /dev/nvme0 --raw-binary > nvme0_smart.raw
5. Method B: use smartctl from smartmontools (complementary)
smartctl can produce an -a report and run tests. For NVMe you typically use the controller device like /dev/nvme0:
B.1 Quick health check:
sudo smartctl -H /dev/nvme0
This returns a high-level health assessment.
B.2 Full report:
sudo smartctl -a /dev/nvme0
This shows many fields similar to nvme smart-log and some additional interpretation that smartctl provides.
B.3 Run a self-test (if supported)
sudo smartctl -t short /dev/nvme0
# or
sudo smartctl -t long /dev/nvme0
Check results after the test completes:
sudo smartctl -l selftest /dev/nvme0
Notes: NVMe support in smartmontools exists but historically arrived later than SATA support — it’s stable on modern distributions but you may occasionally find vendor-specific differences. Use nvme-cli for NVMe-native features and smartctl for compatibility/familiar output.
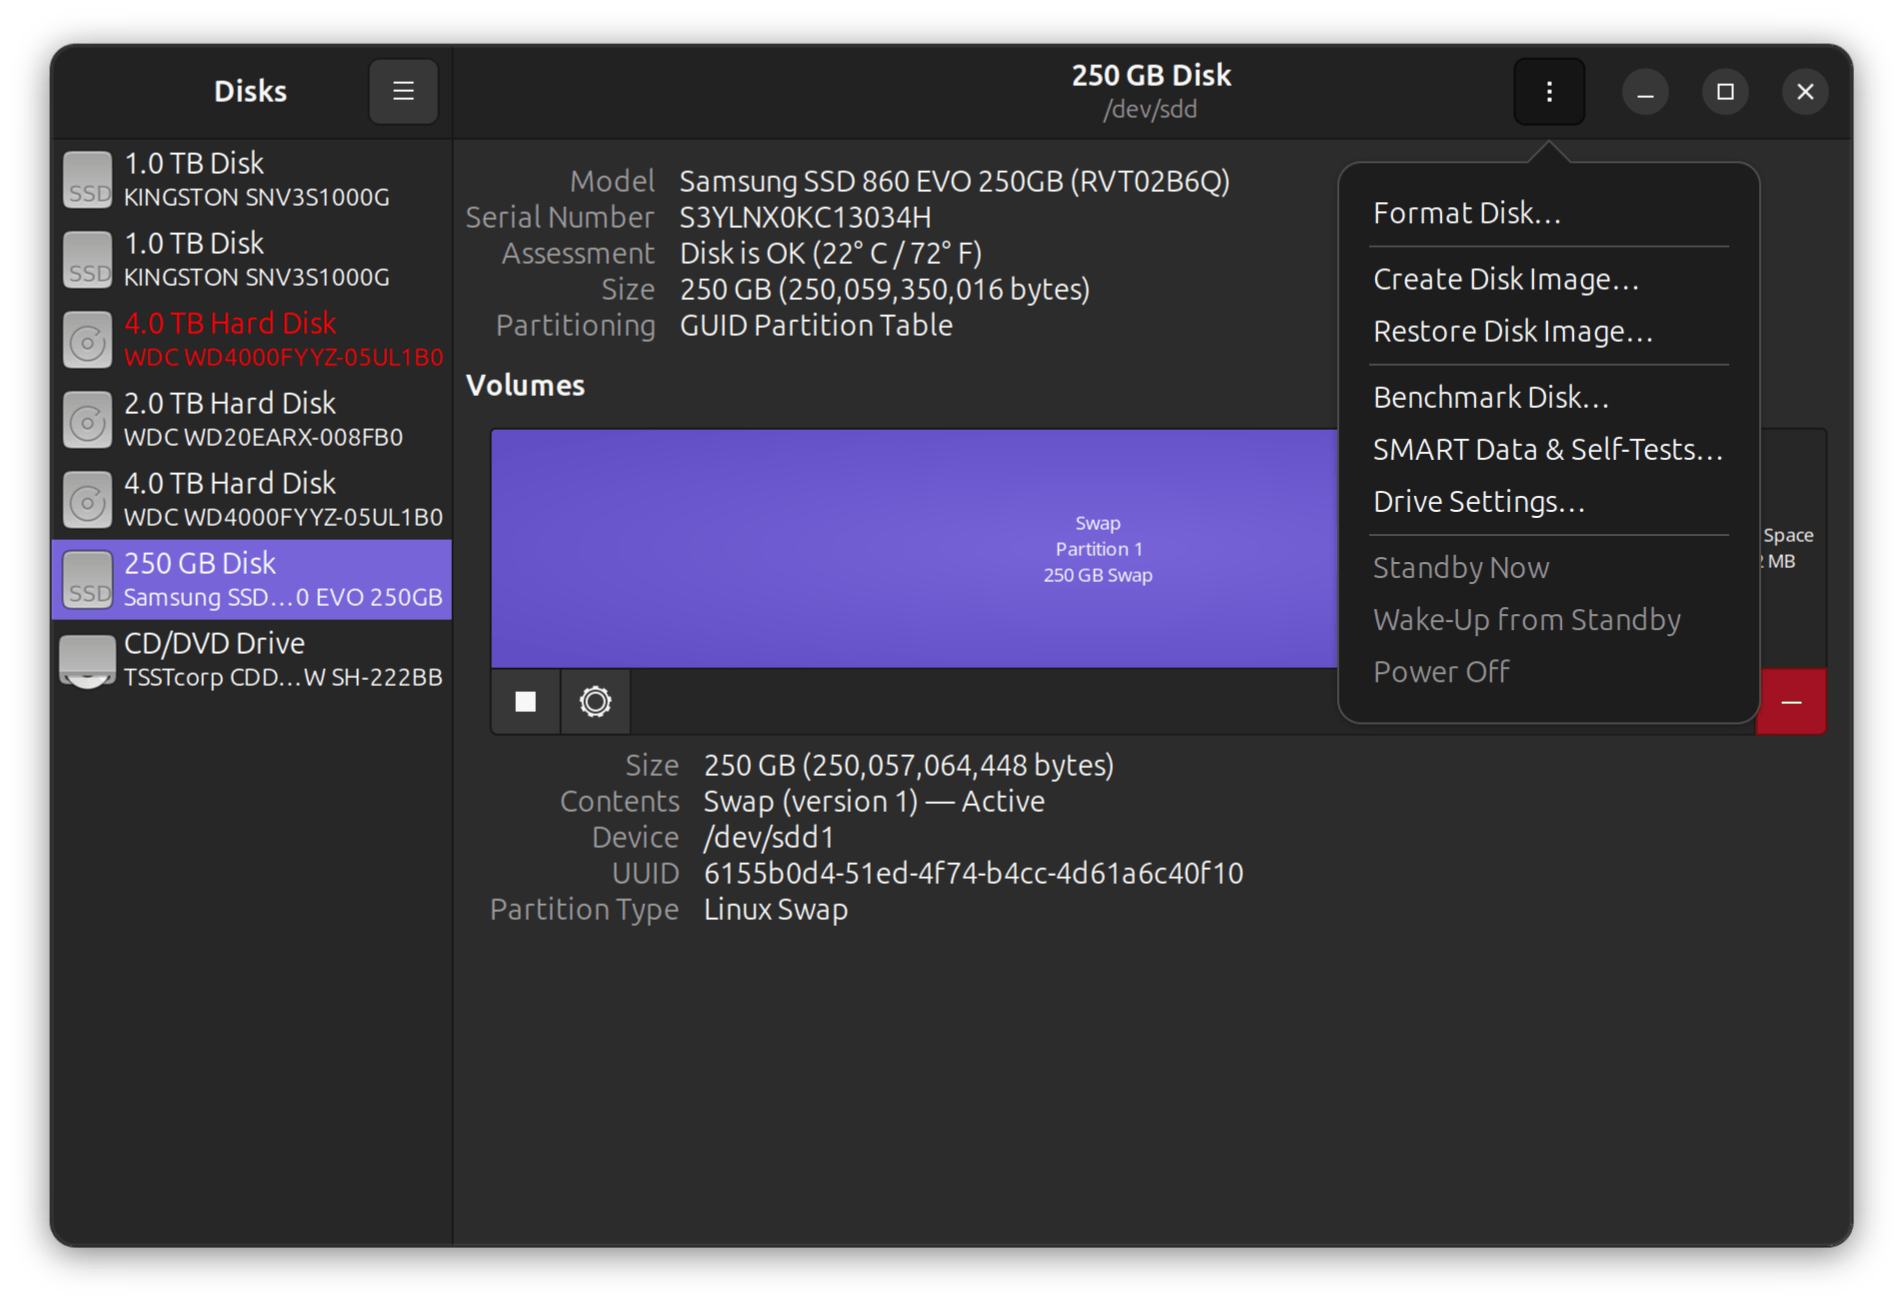
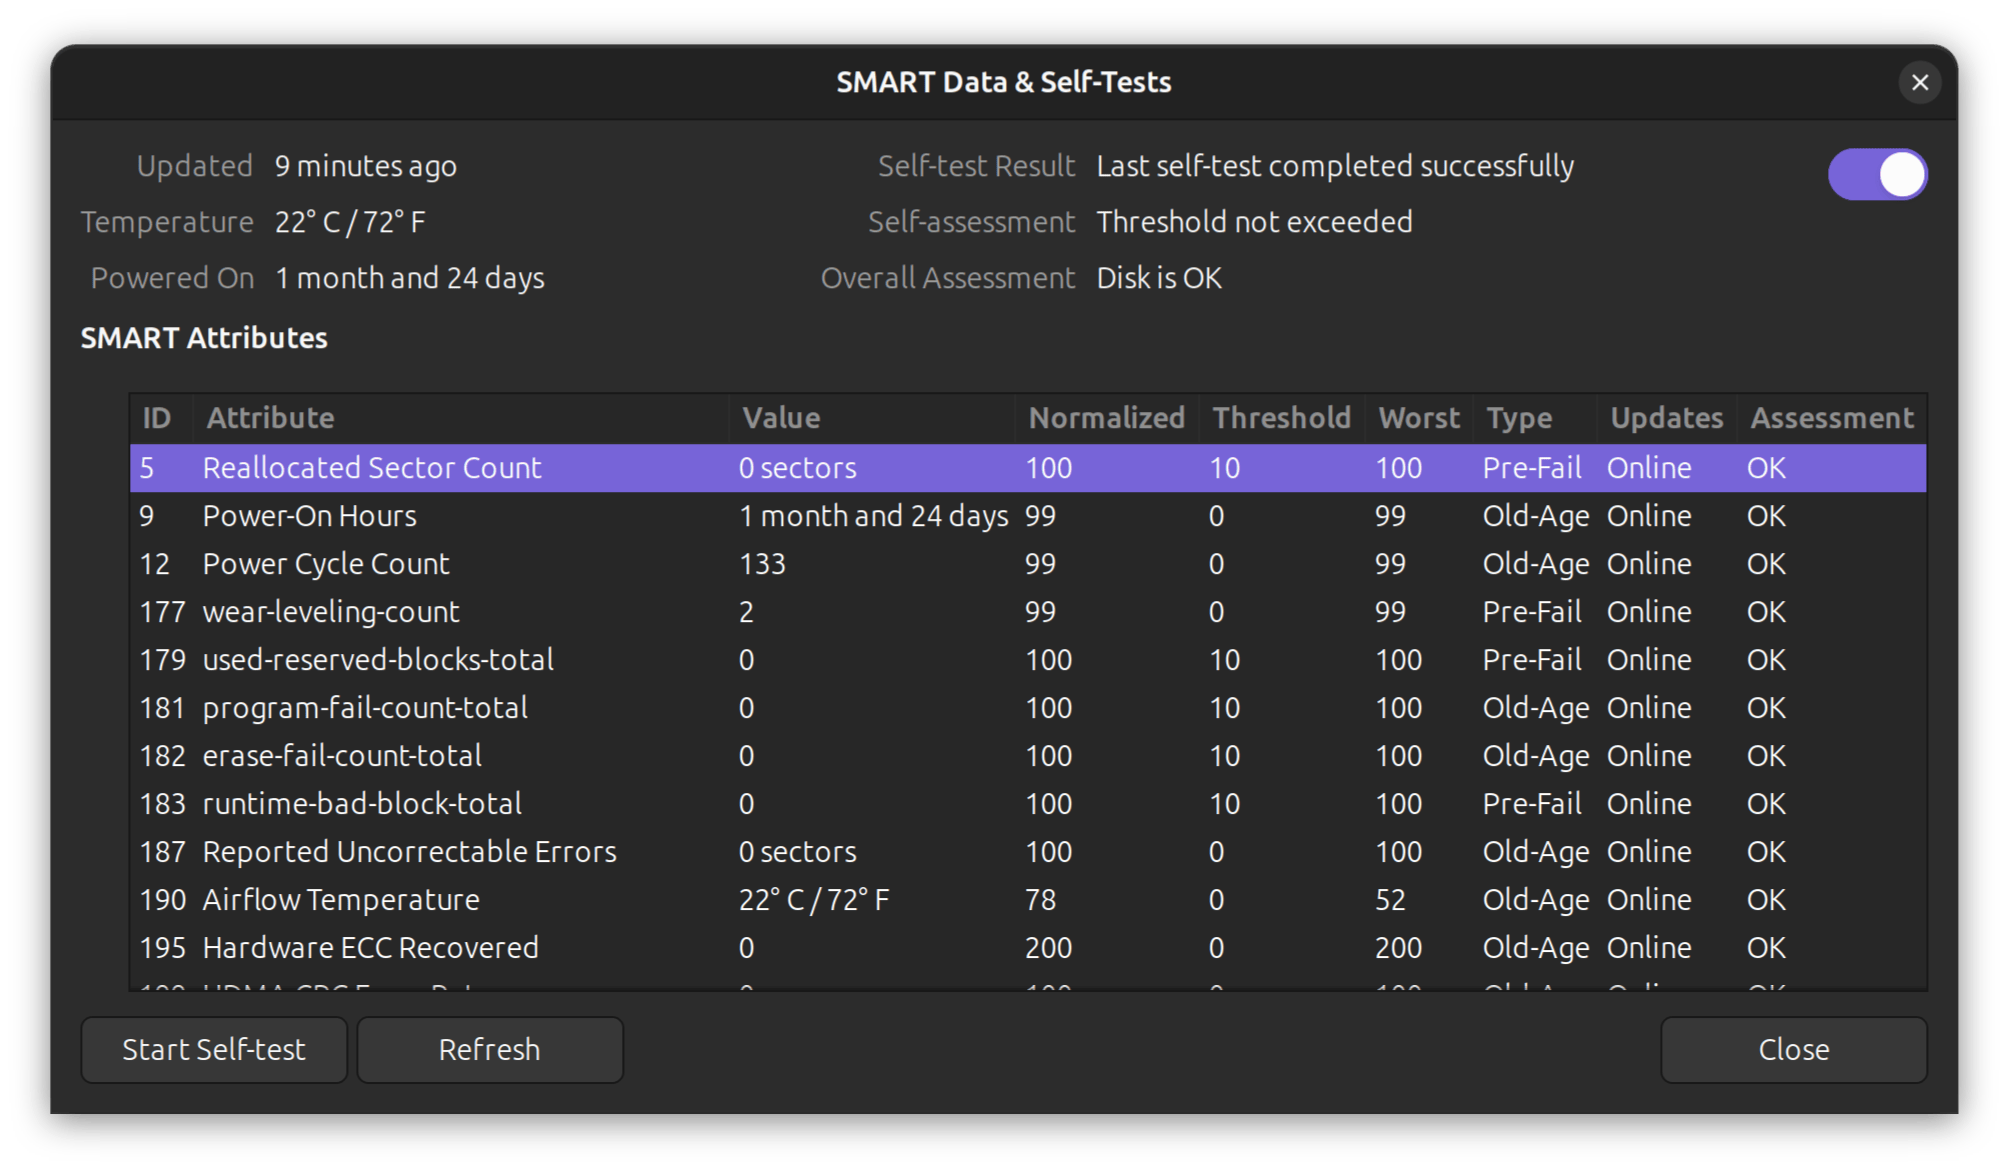
6. Method C: quick GUI check with GNOME Disks
- Open Activities → Disks (or run
gnome-disks). - Select your Kingston NVMe drive from the left column.
- Click the three-dot menu (top right) → SMART Data & Self-Tests.
- Review: overall assessment, attributes, and run self-tests.
This is ideal for quick checks or when showing an end-user a result. The Disks frontend simply reads the same SMART info and offers self-tests.

7. Self-tests, logs, and ongoing monitoring
Run scheduled self-tests and monitoring with smartd (part of smartmontools)
smartd can watch devices and run tests on a schedule, emailing or logging problems. Configure /etc/smartd.conf and enable the smartd service:
sudo systemctl enable --now smartd.service
Example smartd.conf line (simple):
/dev/nvme0 -H -f -l error -m you@yourdomain.com
(Adjust options for your environment and read man smartd carefully.) smartd is powerful but needs careful configuration for NVMe (and to avoid spamming logs).
Use a light systemd timer script (alternative)
If you prefer simple periodic checks, you can create a small script that runs nvme smart-log and stores the JSON to /var/log/nvme-health/ once a day. Use a systemd timer to schedule it.
Example script (conceptual):
#!/bin/bash
outdir=/var/log/nvme-health
mkdir -p "$outdir"
timestamp=$(date -Iseconds)
sudo nvme smart-log /dev/nvme0 --output-format=json > "$outdir/nvme0_$timestamp.json"
Then add a systemd service and timer to run it daily. This gives you a historical record (very useful to spot trends).
8. Firmware updates and Kingston utilities
Manufacturers sometimes release firmware updates that fix bugs or improve reliability. Kingston publishes firmware & tools (Kingston SSD Manager) for their drives; for consumer NVMe drives you can check Kingston’s support page for model-specific utilities and firmware updates. If a firmware update is available, follow Kingston’s instructions—read them carefully. Back up before any firmware flash. (Kingston Technology Company)
Important: Many vendor firmware updaters run only on Windows. If that’s the case, either create a Windows PE USB to run the vendor tool, use vendor ISO update utilities, or check if vendor provides a Linux utility or a vendor-neutral tool (rare). Always backup first.
9. Safe maintenance tips & what to do when you see red flags
Backup first, always. If you see any non-zero critical_warning, non-zero media_errors, high percentage_used (close to 100), or repeated unsafe shutdowns, immediately back up any important data.
What to watch for (priority):
critical_warning != 0→ immediate investigation and backup.media_errors > 0ornum_err_log_entries > 0→ serious concern.percentage_usedclimbing fast or near manufacturer rating.- High/unstable
temperaturereadings (sustained >70°C is bad for longevity). - Unexpected increase in
unsafe_shutdowns(may indicate power or cabling issues).
If you find a problem:
- Stop heavy writes and back up data.
- Try to reproduce (a single transient error may be benign; repeated errors are not).
- Update firmware if the manufacturer recommends a fix.
- Replace the drive if errors persist; SSD replacement is inexpensive compared to lost data.
10. Example troubleshooting scenarios & fixes
Scenario A — nvme smart-log shows percentage_used: 0 but media_errors > 0:
A few media errors can be caused by transient issues (power glitch, cable, controller hiccup). Immediately backup, run nvme error-log /dev/nvme0 and nvme smart-log again after a reboot. If errors persist, consider RMA.
Scenario B — laptop shows weird I/O errors after resume from sleep:
Check dmesg for NVMe/driver errors. Try a firmware update, check kernel versions (sometimes kernel NVMe fixes appear in newer kernels), and consider replacing the M.2 card if vendor advises.
Scenario C — Disks shows disabled SMART for NVMe:
Make sure smartmontools and nvme-cli are installed. Some desktop environments hide SMART options for NVMe — use the command line to be sure.
11. Practical commands cheat-sheet (copyable)
Identify device:
sudo nvme list
lsblk -o NAME,MODEL,SIZE
NVMe SMART (controller):
sudo nvme smart-log /dev/nvme0
sudo nvme id-ctrl /dev/nvme0
Save JSON:
sudo nvme smart-log /dev/nvme0 --output-format=json > nvme0_smart.json
smartctl:
sudo smartctl -H /dev/nvme0
sudo smartctl -a /dev/nvme0
sudo smartctl -t long /dev/nvme0
sudo smartctl -l selftest /dev/nvme0
View kernel messages (if I/O issues):
sudo dmesg | grep -i nvme
Check temp quickly (if nvme shows no temp):
nvme smart-log /dev/nvme0 | grep temperature
12. Final checklist before you sleep easy
- Back up important data (always first).
- Run
sudo nvme smart-log /dev/nvme0and save the JSON. - Check
critical_warning,percentage_used,media_errors,temperature. - Install and configure
smartdor a small systemd timer script to collect logs daily. - Check Kingston support for firmware updates and tools — only apply vendor firmware per instructions. (Kingston Technology Company)
- If anything is alarming, reduce writes and prepare to replace the drive.