

1. A Decade of Loyalty
This year—or at the latest, next year—my Dell XPS 15 9550 will turn 10. That’s right: nearly a decade of faithful service. This laptop has been with me through days, nights, countless projects, and even more coffee-fueled marathons.
But lately, time has been unkind to it. Specifically, the top carbon-fiber-like panel around the keyboard started exuding… glue. And when I say glue, I really mean it—an unpleasant sticky substance began surfacing from the material.
The result? A magnet for dust, dirt, dog hair, crumbs, and who-knows-what else. Touching it became unbearable. Imagine working on a keyboard surrounded by a flytrap—that’s how it felt.
So, about a year ago, I ordered a replacement panel. My plan: swap it out and give my trusty companion a second life.
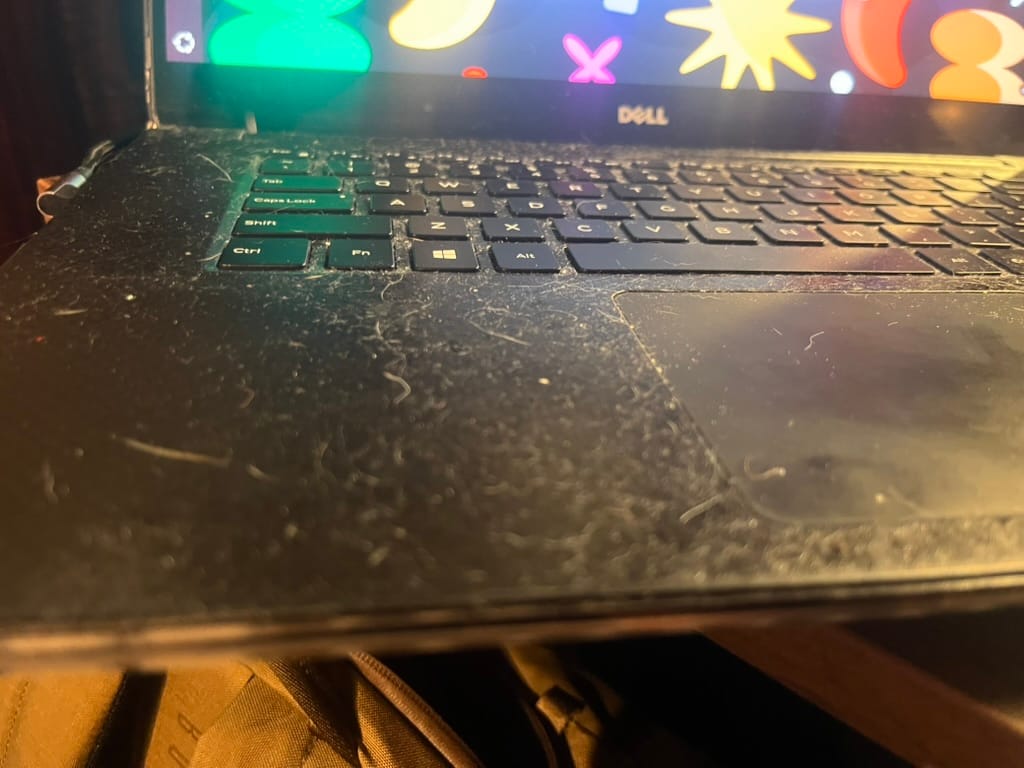
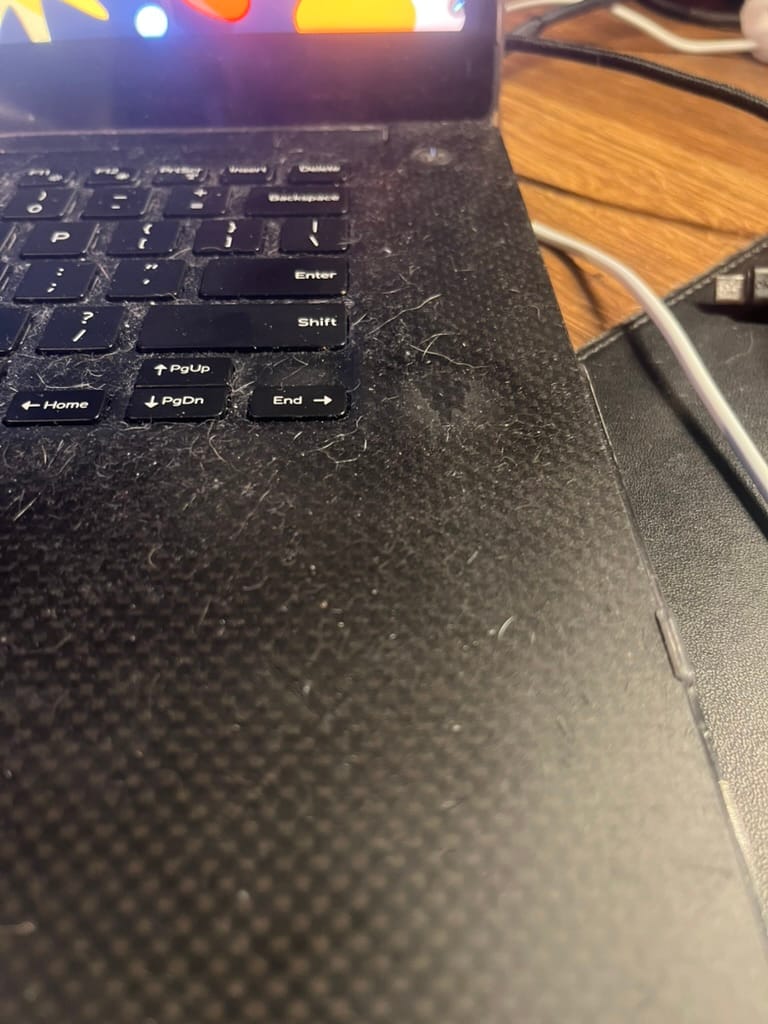
Dell XPS 15 - The old panel
2. The Birthday Upgrade Plan
Since the laptop was approaching its 10th birthday, I decided to celebrate with a big upgrade session. The plan was simple:
- Replace the sticky panel (the dealbreaker).
- If that worked, proceed with more upgrades.
The catch? To replace this panel, I’d have to take the laptop almost entirely apart. That thought alone kept me from doing it for months. But one late night, while listening to an online course, I decided: Tonight’s the night.
Luckily, I own a precision screwdriver kit with every imaginable bit. A must-have for anyone crazy enough to do surgery on a 10-year-old laptop.
3. Surgery Begins
Taking it apart went smoother than I expected. I removed the bottom case, disconnected the battery, cooling system, Wi-Fi card, and more. Finally, I reached the keyboard assembly—the root cause of the sticky panel.
Here’s the tricky part: the keyboard was attached to the panel with tiny screws behind nearly every key. Most came out fine, but one broke and stayed stuck. I decided to gamble and see if it would fit into the new panel anyway.
Eventually, I freed the panel from the screen hinges, swapped it with the fresh one, and began the reassembly.
That’s when trouble struck.
4. Panic Mode: The Laptop Refuses to Start
I closed everything, pressed the power button… nothing. On the second and third attempts, the fans spun up, ran for a few seconds, then stopped. Over and over again.
Classic sign: something wasn’t connected right, or worse—something shorted.
So, I disassembled everything again. Checked every cable, every connector, every screw. Reassembled. Same problem.
At this point, I remembered: I hadn’t done this kind of deep repair in over 15 years. For the past decade, I’ve been living by the principle of “just buy it ready and never open it.” Clearly, those skills were a little rusty.
5. Back to Basics: Resetting Everything
I decided to go old-school and reset everything. I removed both the main battery and the tiny CMOS battery, then pressed the power button for over 30 seconds to fully discharge the system.
After partially reassembling the laptop (just enough to keep it from falling apart), I pressed the power button again.
This time—nothing. Completely dead. My heart sank. Was the motherboard fried?
But then I remembered: the power button had been acting up recently, often requiring multiple presses. So I grabbed the original charger (not USB-C, but the big proprietary Dell power brick), plugged it in, pressed the button…
And—miracle! A blue diagnostic screen appeared.
The test revealed only one problem: the missing battery, which was lying right next to me on the desk.
Once reinstalled, the system booted into Ubuntu. I fully reassembled the laptop, hit the power button, and for the first time in ages, it started on the very first try.
6. The Transformation
With the sticky panel gone, the laptop looked brand new. That alone felt like a victory. But I wasn’t done yet. If I had come this far, I might as well go all in:
- Wi-Fi/Bluetooth Upgrade
Replace the problematic Broadcom card (notorious for issues under Linux) with a reliable Intel card. Goodbye random disconnections, hello smooth wireless and Bluetooth. - RAM Upgrade
Swap out the two 16 GB DDR4 modules for two 32 GB ones. Yes, the chipset only supports up to 2133–2200 MHz, but that still gives me 64 GB total—enough to run virtual machines the size of small planets. - Storage Upgrade
Replace the old NVMe SSD with a 2 TB or even 4 TB NVMe drive. Same speed (up to 3.5 GB/s), but far more room for code, models, and virtual machines.
7. Conclusion
Reviving this decade-old Dell XPS 15 9550 turned out to be a rollercoaster. What started as a desperate attempt to fix a sticky keyboard panel became a full-blown restoration and upgrade project.