

In today’s fast-paced software development environment, managing Jenkins through its graphical user interface (GUI) can become challenging as the complexity and number of jobs grow. Jenkins Configuration as Code (JCasC) provides a powerful solution to this by allowing Jenkins configuration to be defined and managed via code, ensuring consistent, scalable, and version-controlled configurations.
In this post, we'll explore how to set up Jenkins with JCasC, including an introduction to its key concepts, a step-by-step guide to installation, and best practices for managing Jenkins configuration as code.
1. What is Jenkins Configuration as Code (JCasC)?
Jenkins Configuration as Code (JCasC) is a feature that allows you to define Jenkins configuration through human-readable YAML files, rather than relying on manual configurations through the Jenkins web UI. JCasC can configure nearly every aspect of Jenkins, including jobs, agents, security settings, credentials, plugins, and more.
By leveraging JCasC, you can:
- Automate Jenkins setup.
- Version control your Jenkins configuration.
- Easily share and replicate Jenkins configurations across environments.
2. Benefits of Using JCasC
Using Jenkins Configuration as Code comes with numerous advantages, including:
- Consistency: You can ensure that your Jenkins configuration is consistent across multiple environments, such as development, staging, and production.
- Version Control: Since the configuration is stored in YAML files, you can track changes over time, roll back to previous configurations, and manage everything through a version control system (e.g., Git).
- Scalability: JCasC is particularly helpful in large-scale Jenkins deployments, allowing teams to quickly replicate Jenkins instances with the exact same configuration.
- Automation: Jenkins can be automatically configured when it starts up, eliminating manual intervention.
3. Prerequisites
Before setting up Jenkins with JCasC, ensure you have the following:
- Jenkins Installed: You need a running Jenkins instance (preferably version 2.222.1 or higher).
- Admin Access: You should have administrative privileges on your Jenkins server.
- Jenkins Plugins: Certain plugins might be required depending on the features you want to configure.
- Basic Knowledge of YAML: Since JCasC uses YAML format, a basic understanding of YAML syntax is beneficial.
4. Installing the JCasC Plugin
The first step to use Jenkins Configuration as Code is to install the Configuration as Code Plugin (JCasC plugin) in Jenkins. Here’s how you can do that:
Step 1: Install the JCasC Plugin
- Log in to Jenkins as an administrator.
- Navigate to Manage Jenkins > Manage Plugins.
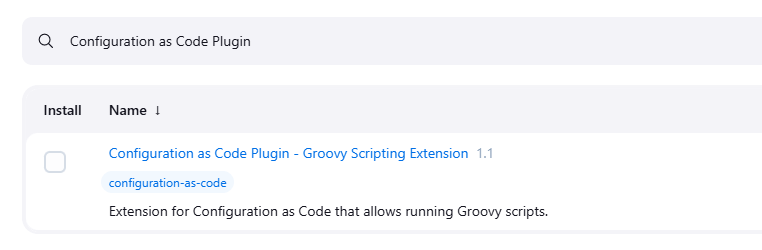
- In the Available tab, search for Configuration as Code.
- Select the plugin and click Install without restart.
Step 2: Verify Plugin Installation
Once the plugin is installed, you should see a new section labeled Configuration as Code under Manage Jenkins. This confirms that the plugin has been successfully installed.

5. Configuring Jenkins with JCasC
Once the plugin is installed, you can start defining your Jenkins configuration in a YAML file. In this section, we’ll walk through creating a basic JCasC configuration file and loading it into Jenkins.
5.1 Basic JCasC Configuration File
Let’s start by writing a basic configuration file that defines Jenkins security settings and installs a couple of plugins. Below is an example JCasC YAML file:
jenkins:
  systemMessage: "Welcome to Jenkins configured as code!"
  securityRealm:
    local:
      allowsSignup: false
      users:
        - id: "admin"
          password: "admin"
  authorizationStrategy:
    loggedInUsersCanDoAnything:
      allowAnonymousRead: false
  credentials:
    system:
      domainCredentials:
        - credentials:
            - basicSSHUserPrivateKey:
                scope: SYSTEM
                id: "ssh-credentials"
                username: "git-user"
                privateKeySource:
                  directEntry:
                    privateKey: |
                      -----BEGIN RSA PRIVATE KEY-----
                      (Your Private Key Here)
                      -----END RSA PRIVATE KEY-----

tool:
  git:
    installations:
      - name: "Default"
        home: "/usr/bin/git"

unclassified:
  location:
    adminAddress: "admin@mycompany.com"

plugins:
  required:
    - "git"
    - "blueocean"
This configuration sets up:
- A system message
- Local security with an admin user
- SSH credentials for Git
- Installation of the Git and Blue Ocean plugins
5.2 Loading JCasC via Jenkins UI
You can load the configuration file directly through the Jenkins UI:
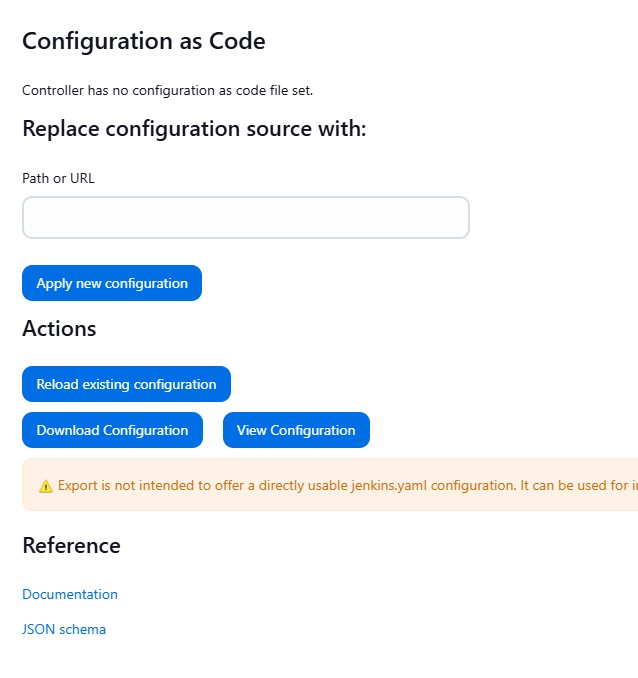
- Go to Manage Jenkins > Configuration as Code.
- Select Download Configuration to see the current Jenkins configuration in YAML format. This is useful as a reference for writing your own configurations.
- To apply a new configuration, use the Upload Configuration section and upload your YAML file. Jenkins will immediately apply the configuration.
5.3 Loading JCasC via Environment Variables
For automated setups, it’s often useful to load the configuration from an environment variable. You can achieve this by setting the CASC_JENKINS_CONFIG environment variable to the path of the YAML file.
export CASC_JENKINS_CONFIG=/path/to/your/configuration.yaml
When Jenkins starts up, it will automatically load the configuration from this file.
6. Versioning and Managing Configuration Files
One of the biggest benefits of using JCasC is the ability to version control your Jenkins configuration files.
Step 1: Store Configuration Files in Git
- Create a Git repository to store your Jenkins configuration files (e.g.,
jenkins-config-repo). - Push your
configuration.yamland any related files to this repository.
Step 2: Automate Jenkins Configuration Updates
You can automate the process of updating your Jenkins configuration by pulling the latest version of the YAML file from your Git repository. You could use a Jenkins job to pull changes from your jenkins-config-repo and apply them via the CASC_JENKINS_CONFIG environment variable.
For example, you can configure Jenkins to update its configuration on each commit to the repository.
7. Best Practices for Using JCasC
When managing Jenkins with JCasC, follow these best practices:
- Modularize Configurations: Break up large configurations into smaller, reusable files. For example, have separate YAML files for security, jobs, plugins, and credentials.
- Use Secrets Management: Avoid storing sensitive information (like passwords and SSH keys) directly in the YAML file. Use tools like HashiCorp Vault, AWS Secrets Manager, or Kubernetes Secrets to securely inject credentials into the configuration.
- Test Configuration in Development: Always test your JCasC configurations in a development environment before applying them to production. This can prevent configuration errors from causing downtime.
- Keep Configurations in Sync: Ensure that the configurations stored in version control are always in sync with the live Jenkins instance. Automate regular checks and updates.
- Use Jenkins Templates for Job Configurations: For job configurations, consider using Jenkins Job DSL or Jenkins templates to standardize job definitions.
Conclusion
Jenkins Configuration as Code (JCasC) provides a powerful and efficient way to manage Jenkins configurations by treating them as code. By using JCasC, you can version control your Jenkins setup, automate deployments, and ensure consistent configurations across environments.
In this post, we’ve covered how to install the JCasC plugin, create basic YAML configurations, load them into Jenkins, and follow best practices for managing your Jenkins infrastructure. Adopting JCasC can greatly improve your Jenkins management process, making it more scalable, maintainable, and robust.
Now that you’re equipped with the knowledge to set up Jenkins with JCasC, you can begin automating your Jenkins infrastructure and taking full advantage of configuration as code!