

In modern development practices, staying informed about the status of your continuous integration and deployment (CI/CD) processes is essential. Jenkins, a powerful automation server, offers robust notification options to keep your team updated. In this guide, we’ll walk through configuring Jenkins to send notifications via email and Slack, ensuring that your team is promptly informed about build results and other important events.
1. Prerequisites
Before diving into the setup process, ensure the following prerequisites are met:
- Jenkins is installed and running.
If you're new to Jenkins or need guidance on getting it up and running, check out our post on Jenkins Installation and Setup. - You have administrative access to your Jenkins instance.
- For email notifications:
- How to set up the SendGrid account and send your first email notification: please read Email Notifications with SendGrid and Sending Emails Using SendGrid and Python articles.
- For Slack notifications:
- A Slack workspace and the ability to create an incoming webhook.
Don't have a Slack workspace yet? Follow our detailed guide on Creating a Slack Account and Setting Up a Channel for Notifications.
- A Slack workspace and the ability to create an incoming webhook.
2. Configuring Email Notifications
Email notifications are one of the simplest ways to keep your team updated. Jenkins supports email notifications via the Email Extension Plugin, which we’ll set up below.
2.1 Installing the Email Extension Plugin
- Log in to your Jenkins dashboard.
- From the left sidebar, click Manage Jenkins.
- Select Manage Plugins.
- Navigate to the Available tab.
- Search for Email Extension Plugin and install it.
- If the plugin is already installed, you can skip this step.

2.2 Configuring the SMTP Server
Once the plugin is installed, set up your SMTP server for email notifications:
- Return to the Manage Jenkins page and click Configure System.
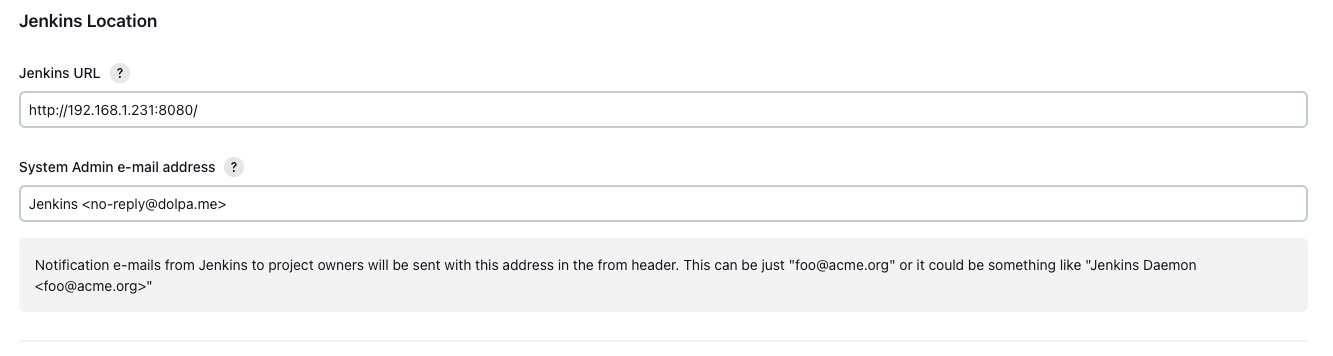
- First, scroll down to Jenkins Location, and in the field of System Admin e-mail address, type something with your Verified domain. In my case, I verified
dolpa.medomain, so I typed in this fieldJenkins no-reply@dolpa.me. - Scroll to the Extended E-mail Notification section.
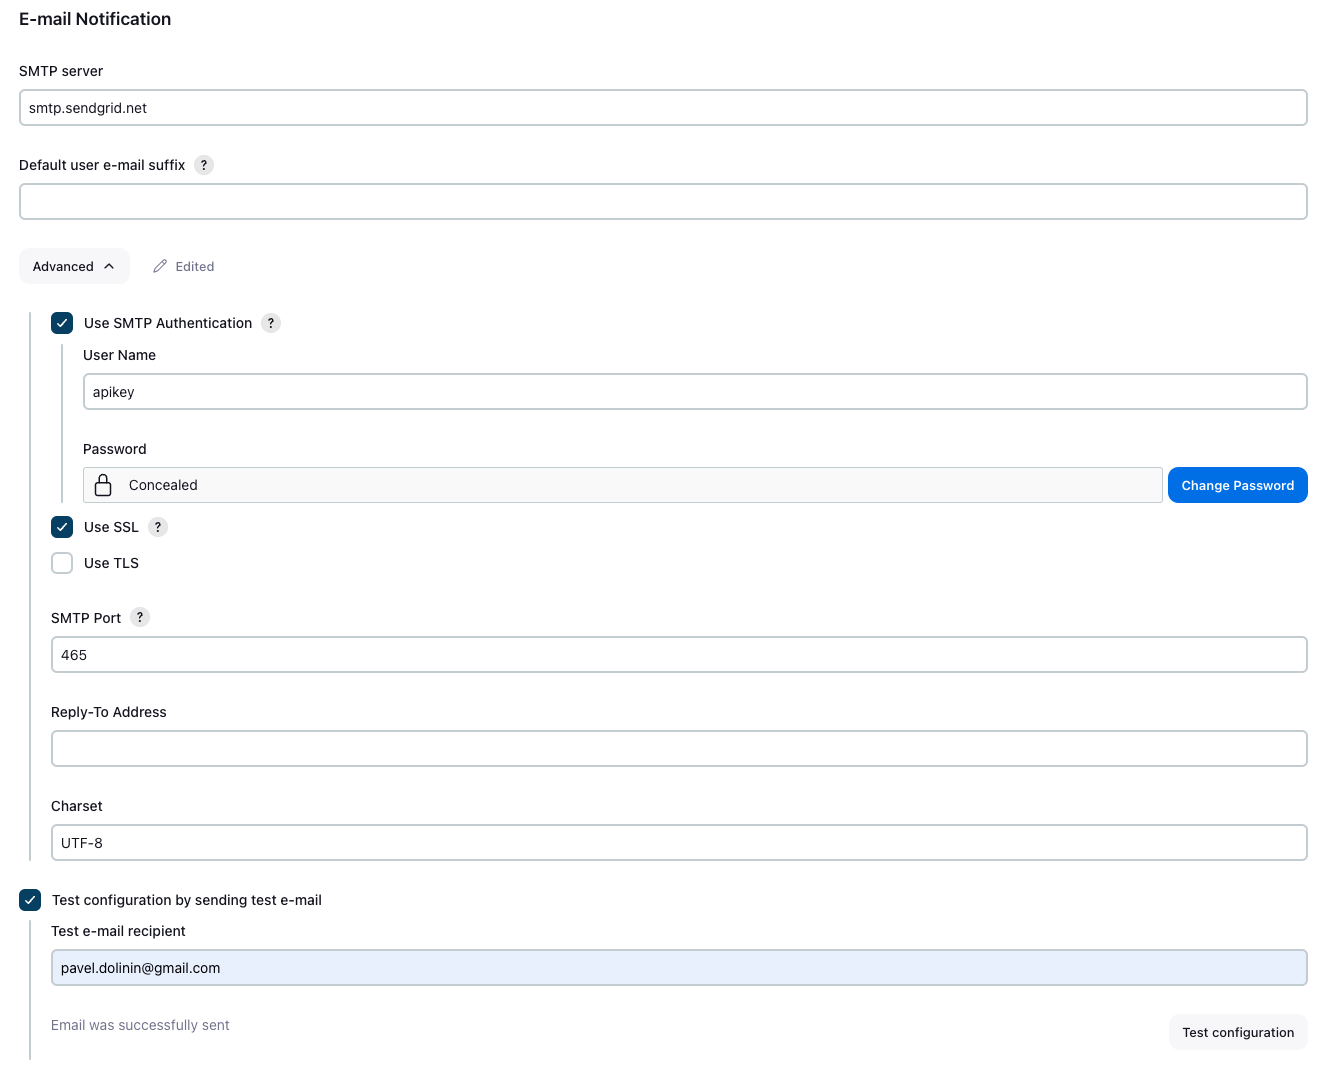
- Configure the SMTP server settings:
- SMTP Server: Enter your SMTP server address (e.g.,
smtp.sendgrid.net). - Default User E-mail Suffix: Specify the email suffix (e.g.,
@yourdomain.com). - Use SMTP Authentication: Check this box if required by your server.
- User Name: Enter your SMTP username as it was described on SendGrid documentation (e.g.,
apikey). - Password: Provide your SMTP password,
<SENDGRID_API_KEY>. - Use SSL: Check this if your server requires SSL encryption.
- Port: Use the appropriate port (e.g.,
465for SSL or587for TLS).
- SMTP Server: Enter your SMTP server address (e.g.,
- Test the configuration:
- Click Test configuration by sending test e-mail.
- Enter an email address and click Test.
- Check your inbox for the test email.
Here is the screenshot of Jenkins Location Settings:
Ans the E-mail Notification Settings:
2.3 Adding Email Notifications to a Job
To enable email notifications for a specific job:
- Open the job configuration page for the desired job.
- Scroll to the Post-build Actions section.
- Click Add post-build action and select Editable Email Notification or E-mail Notification.
- Configure the following fields:
- Project Recipient List: Add recipient email addresses separated by commas.
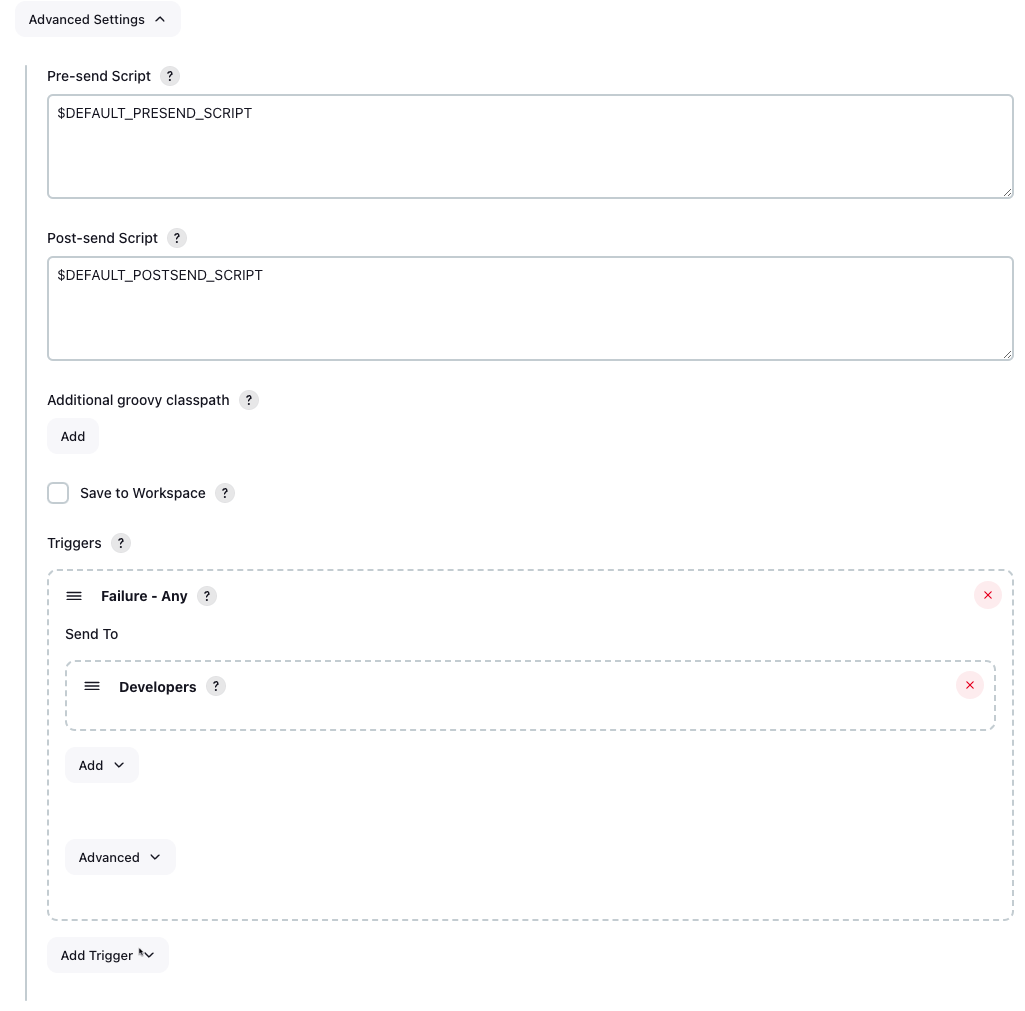
- Default Subject: Customize the email subject (use variables like
${DEFAULT_SUBJECT}). - Default Content: Customize the email body with variables like
${BUILD_STATUS}.
- Set triggers to define when notifications should be sent (in Advanced Settings):
- On failure.
- On every unstable build.
- On success.
- And many others triggers.
For more information about "Email Extention" please read the official documentation here.
3. Option #1: Configuring Slack Notifications with Incoming WebHooks
Slack notifications are ideal for team collaboration, delivering instant updates to shared channels. Here’s how to set them up:
3.1 Setting Up Slack Integration
- In your Slack workspace, go to the Apps section.
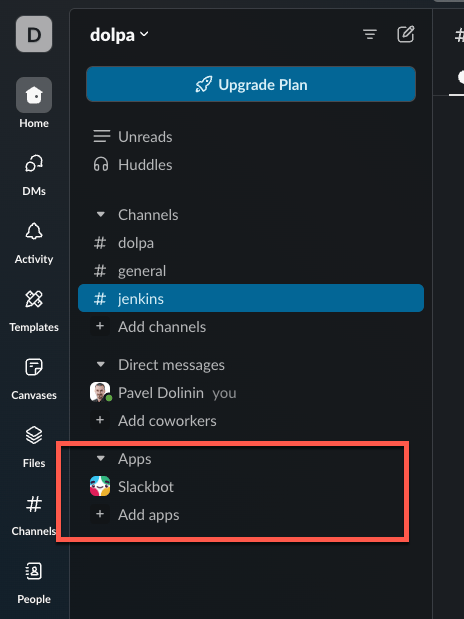
- Search for Incoming WebHooks and click Add to Slack.
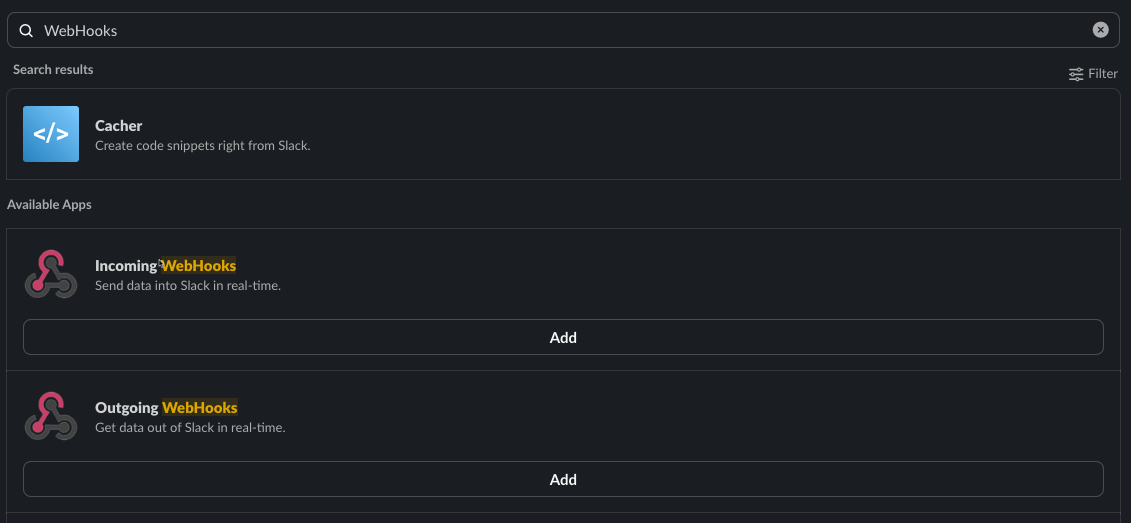
- Choose a channel where notifications will be posted.
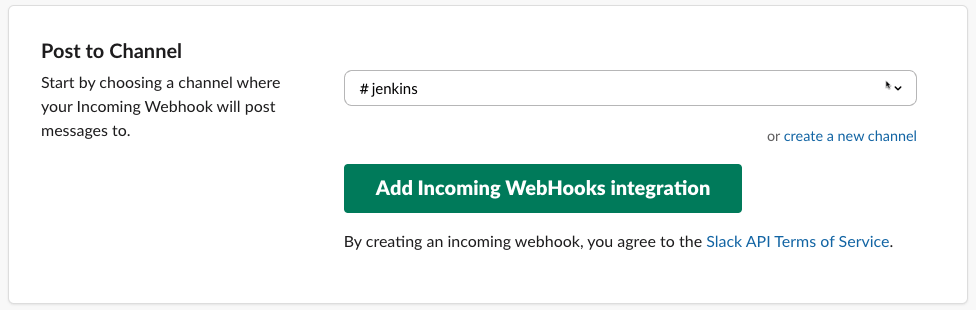
- Click Add Incoming WebHooks integration.
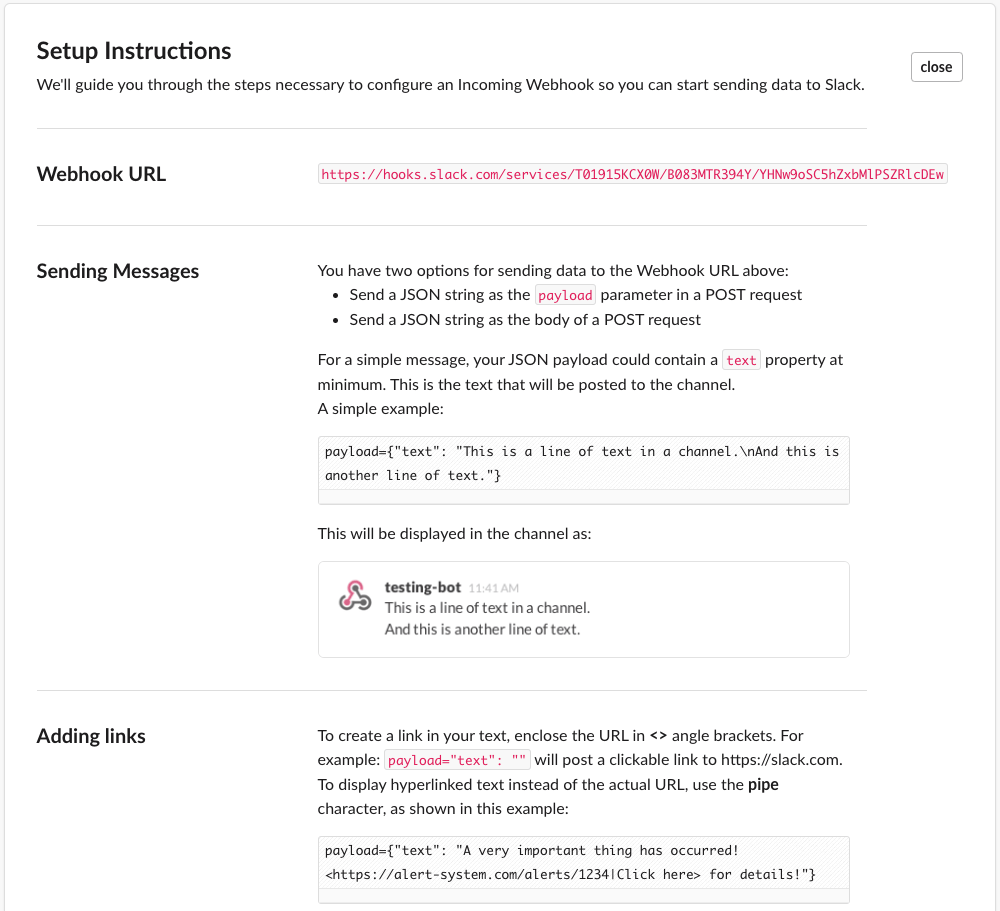
- Copy the Webhook URL generated by Slack.
3.2 Adding Slack Notifications to a Job
- In Jenkins, navigate to the job configuration page for the desired job.
- Scroll to the Post-build Actions section.
- Click Add post-build action and select Slack Notifications.
- Paste the Webhook URL copied from Slack.
- Define notification conditions:
- Send notifications for all builds.
- Notify on failure, unstable builds, or success.
4. Option #2: Configuring Slack Notifications with Chat Bot App
4.1 Install Slack Notification Plugin on your Jenkins
- Go to your Jenkins Server
- From the Jenkins homepage, navigate to Dashboard -> Manage Jenkins -> Plugins.
- Change the tab to
Available, and search forslack,
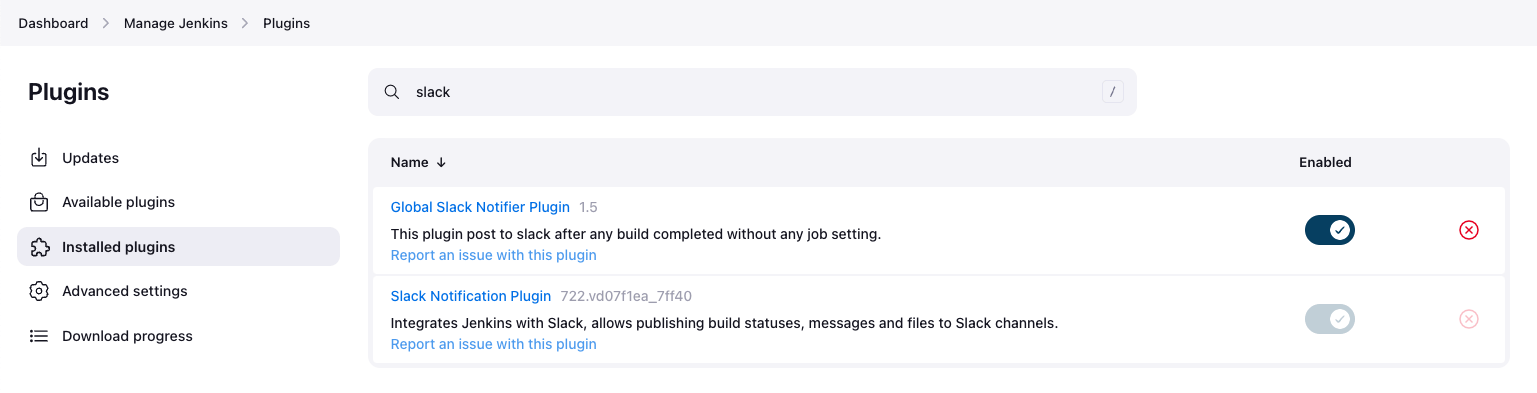
- Install the Slack Notification Plugin, Check the box next to install. On my Jenkins, it's already installed.
4.2 Create Slack new Application
- Navigate in the Browser to https://api.slack.com/apps.
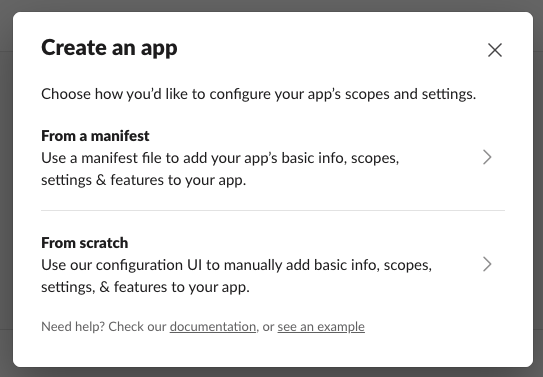
- Click on the big green button Create New App.
- Here, select From a manifest:
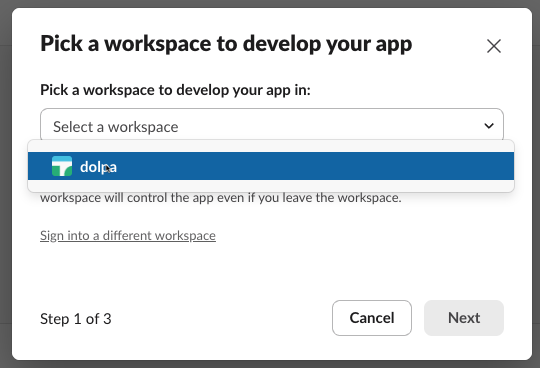
- Select the wanted Workspace:
- Replace the YAML manifest code of the app with following code:
display_information:
  name: Jenkins
features:
  bot_user:
    display_name: Jenkins
    always_online: true
oauth_config:
  scopes:
    bot:
      - channels:read
      - chat:write
      - chat:write.customize
      - files:write
      - reactions:write
      - users:read
      - users:read.email
      - groups:read
settings:
  org_deploy_enabled: false
  socket_mode_enabled: false
  token_rotation_enabled: false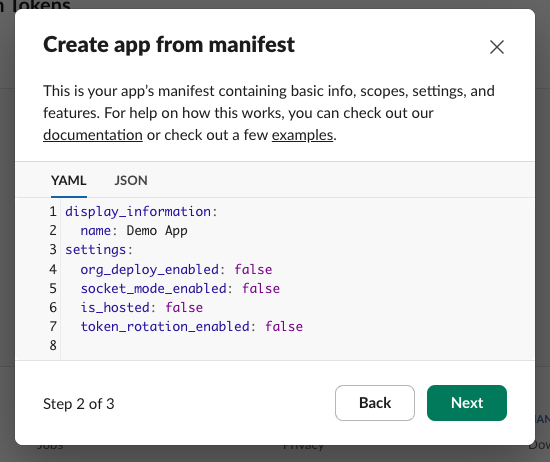
- Now navigate to your Application settings called Jenkins. Here, you will need to generate OAuth Tokens:
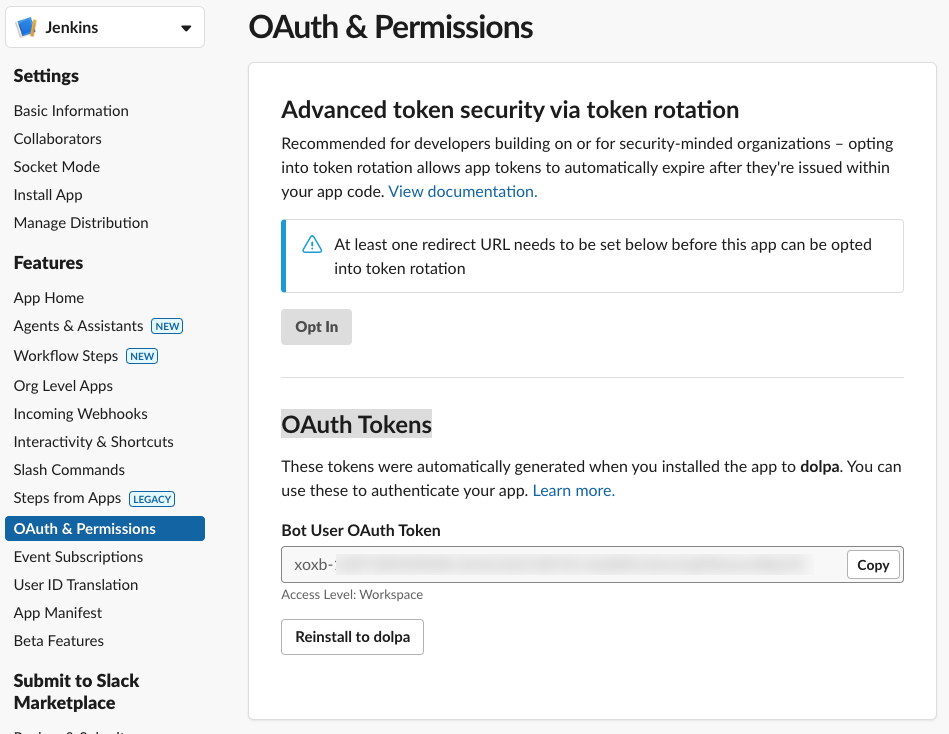
- Press Install to your Workspace. In my case, it's already installed, so the button is gray.
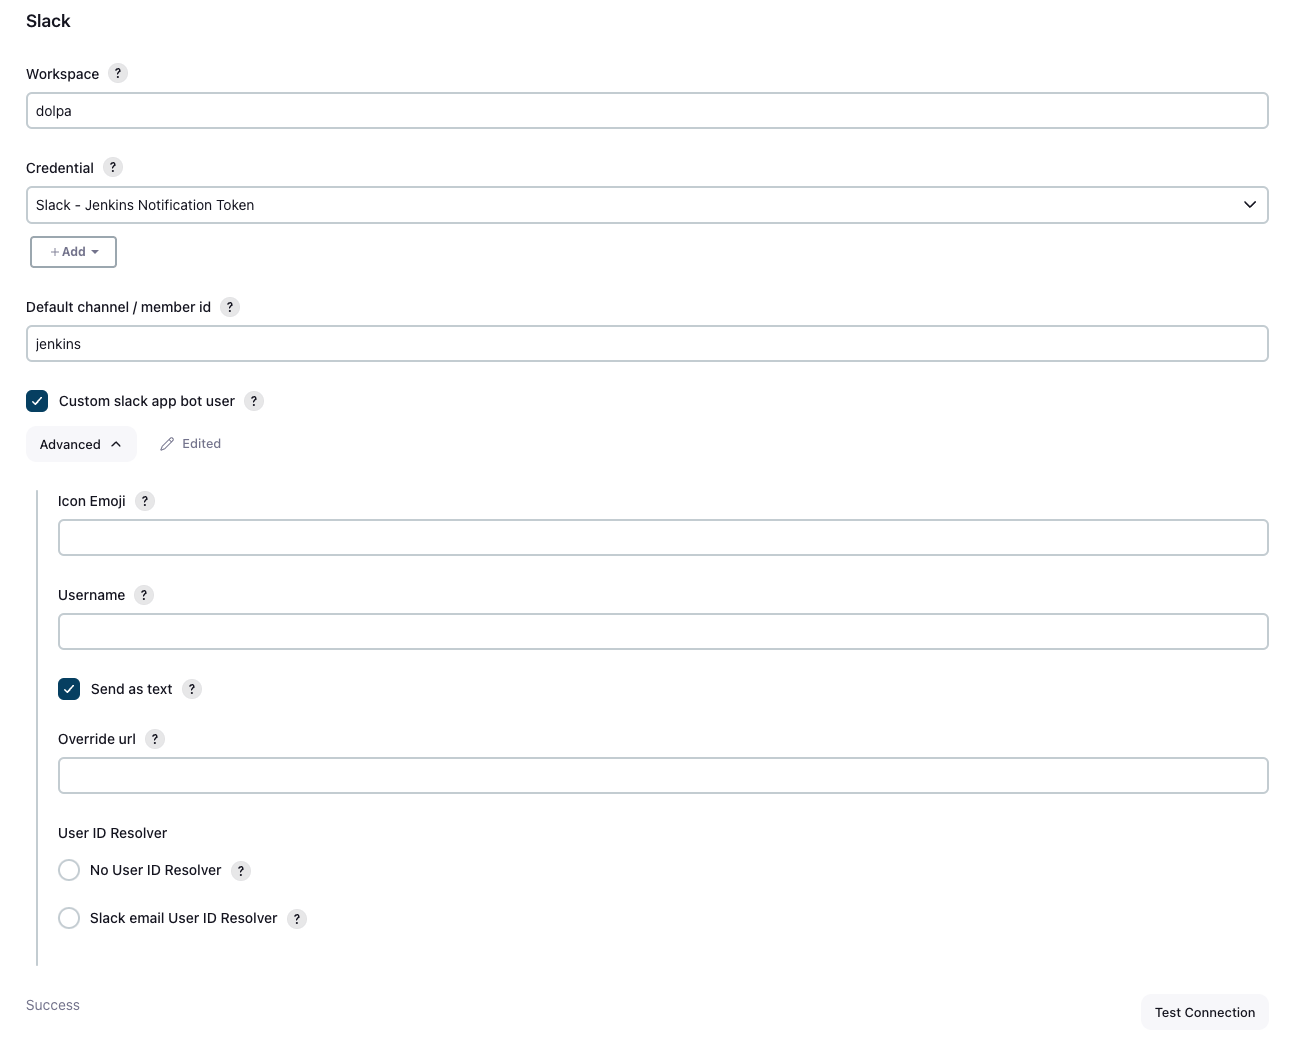
4.3 Configure the Slack Notification Plugin
- Go back to your Jenkins Server Web UI.
- Navigate to System Settings
- Scroll down to the Slack section
- Fill in the name of your Workspace (without
.slack.comat the end) - Add credentials as Secret Text to Jenkins (here, you will need your
OAuth Token) - Type the channel name (don't forget to add your Bot to this channel)
- Check the box that says "Custom slack app bot user"
- Test Connection before saving these changes.
5. Testing Notifications
After configuring notifications, it’s essential to test them:
- Got to any of your jobs
- Add the Post-Build Actions step of Slack Notifications
- Trigger a build for the job with configured notifications.
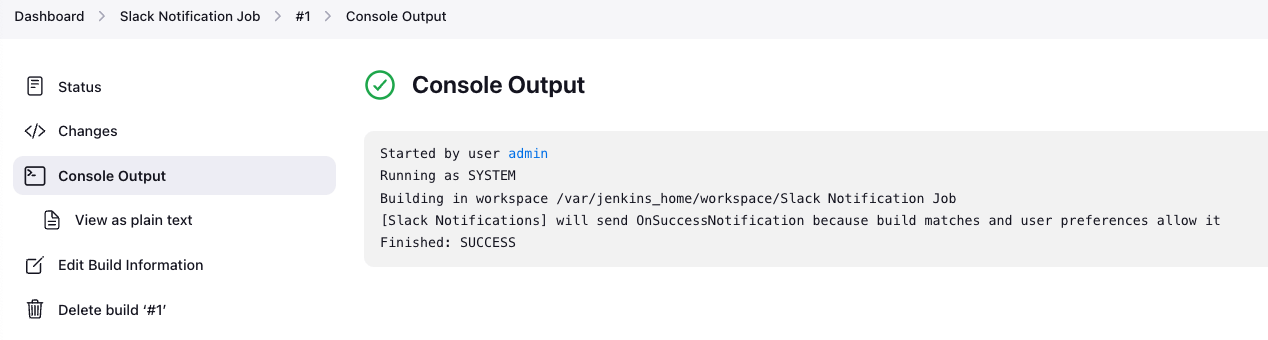
- Verify the job log for a success message:
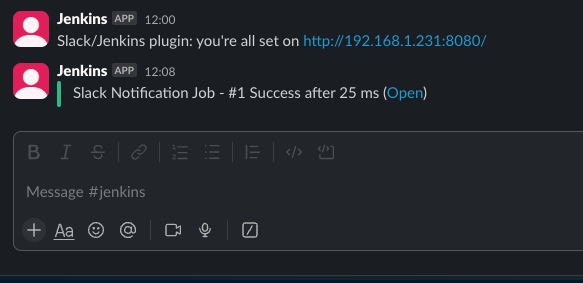
- Verify the following notification appears in the designated Slack channel:
Conclusion
In this post, we’ve walked through setting up basic notifications in Jenkins using email and Slack. These notifications ensure that your team stays informed about the status of CI/CD processes, enabling faster responses to issues and smoother workflows.
Stay tuned for future posts where we’ll dive into advanced Jenkins features, including integrating with other tools and fine-tuning notification settings for complex pipelines.