

In this post, we will guide you through the process of setting up your first Jenkins job. Jenkins is a powerful automation server that enables developers to build, test, and deploy their software. By the end of this tutorial, you will have a basic understanding of how to create and configure a Jenkins job to automate your workflows.
1. Prerequisites
Before we begin, ensure that you have the following:
- Jenkins installed and running (refer to the previous post on How to Install Jenkins).
- Basic understanding of continuous integration and the Jenkins interface.
- Access to a sample project repository (e.g., GitHub, Bitbucket) for demonstration purposes.
2. Accessing Jenkins
- Open your web browser and navigate to the Jenkins dashboard by entering the URL:
http://localhost:8080(or your configured Jenkins server URL). - Log in using your credentials. If you’re using a fresh installation, you might need to unlock Jenkins using the initial admin password found in the Jenkins home directory.
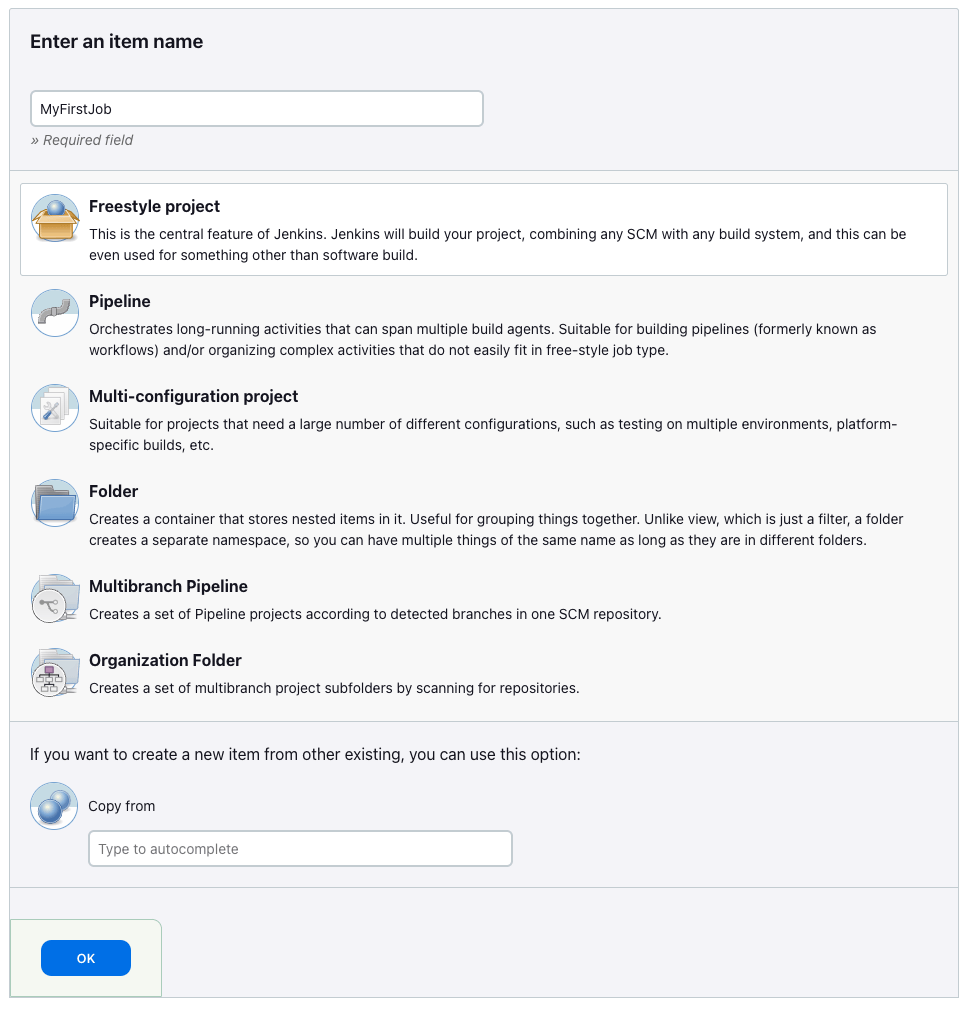
3. Creating a New Job
- On the Jenkins dashboard, click on “New Item” in the left sidebar.
- Enter a name for your job (e.g.,
MyFirstJob). - Choose “Freestyle project” as the job type and click “OK.”
4. Configuring Job Settings
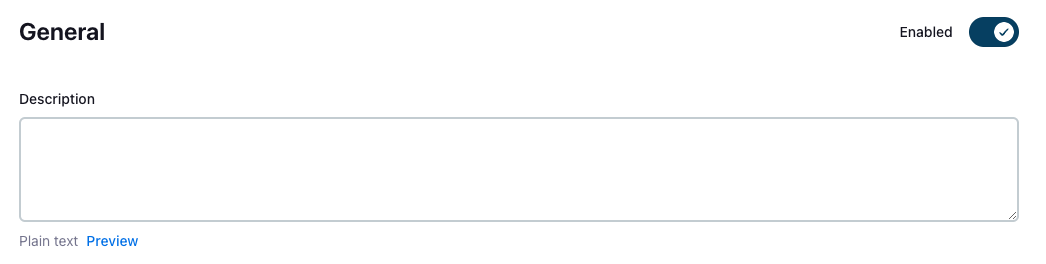
4.1 Set Job Description
- Set the Job Description and Enable or Disable the Job
4.2 Generate SSH key
- Run from your shell the following command to generate new SSH key:
ssh-keygen -o -t rsa -C "<your-email>@email.com"- Place the files recognizable name like
~/.ssh/id_rsa_jenkins_local. - Put the public key to your GitHub account, go to your Profile Settings, and in the right-side menu, click on the SSH and GPG keys:
- Click on New SSH key:
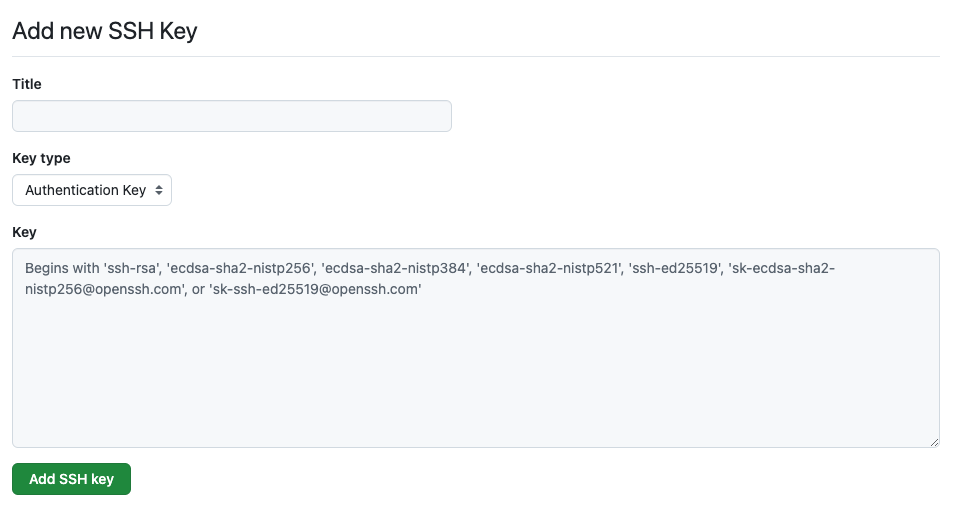
- Place the content of your
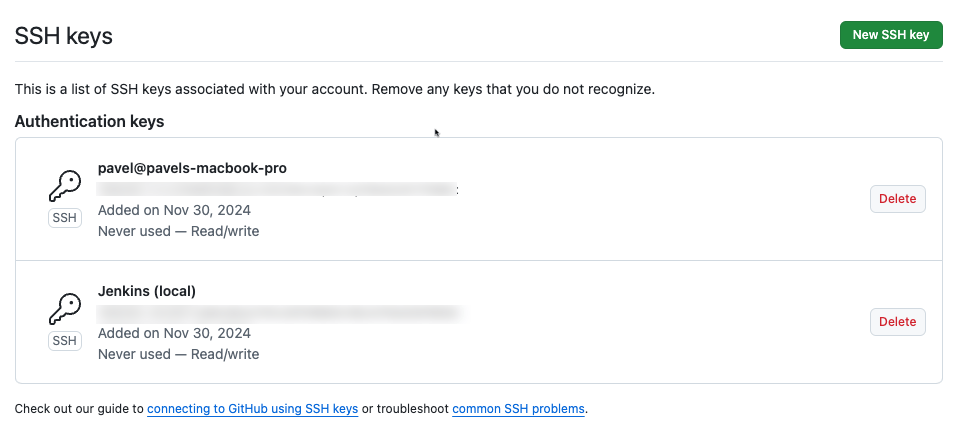
*.pubfile in the text box key and write some description. Click the Add SSH key button. - Check the list of SSH Keys:
4.4 Add SSH key to Jenkins Credentials
- Open your Jenkins Web UI and log in as Admin.
- Navigate to Manage Jenkins and then to Credentials.
- Go to the System Credentials Store and then to Global credentials
- Above the list of credentials, there is a button + Add Credentials
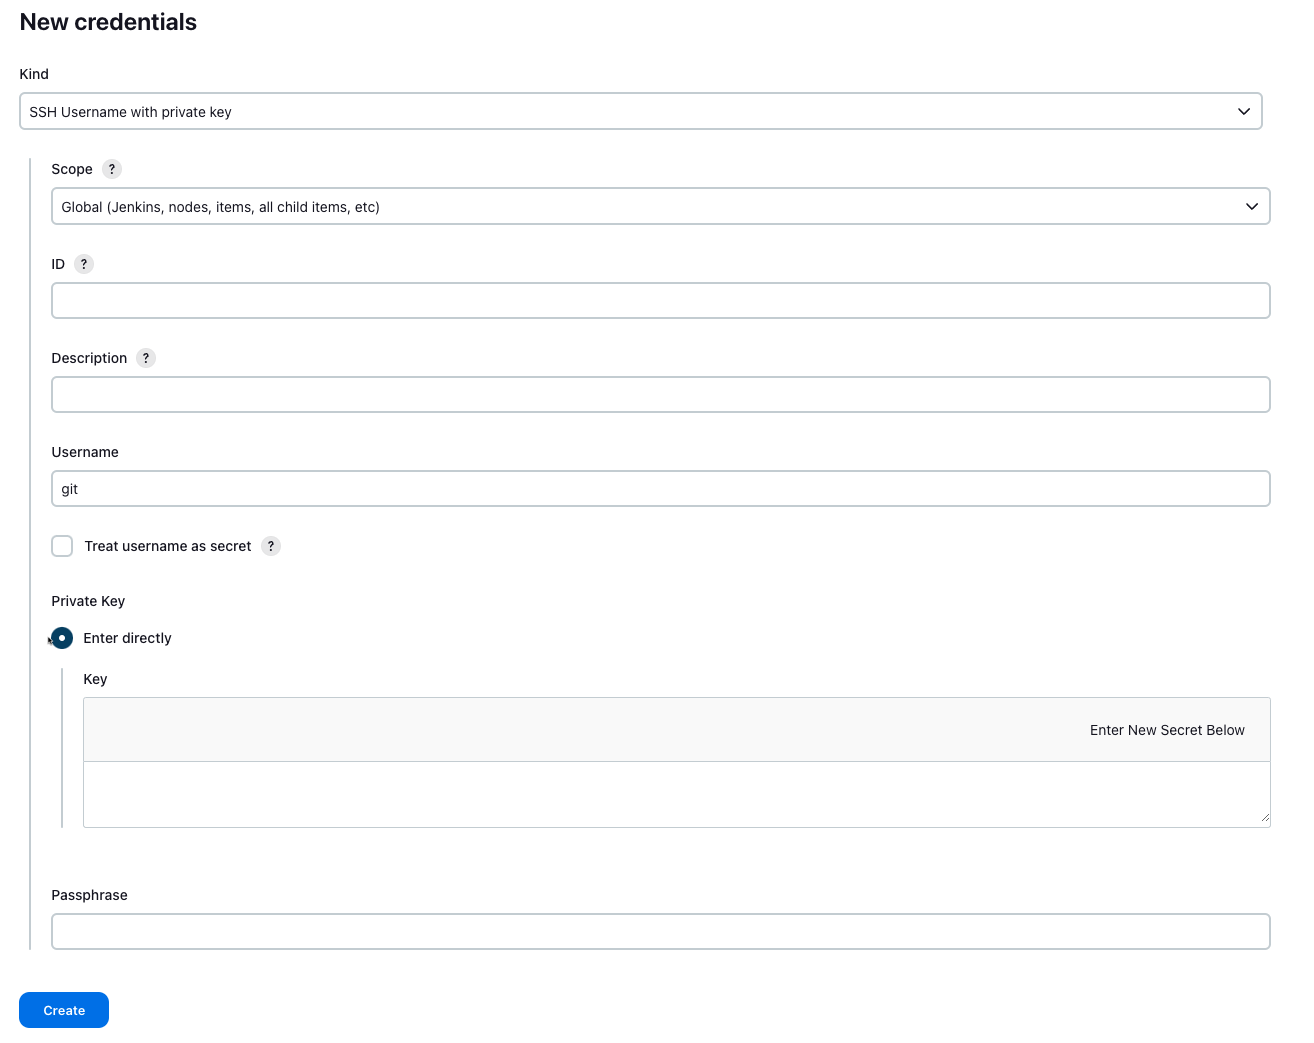
- Change the Kind to SSH Username with private key, keep the Scope Global. The Username should be git. And put the content of the private key file in the field of Key.
4.5 Source Code Management
- Go back to your job configuration.
- Scroll down to the “Source Code Management” section.
- Select the type of version control you are using (e.g., Git). In future posts, we will install more plugins on our Jenkins to expand its capabilities.
- If your repository is private, provide the necessary credentials by clicking on “Add” next to Credentials or select the new SSH Key that you've just added from the list.
Enter the repository URL. For example:
https://github.com/yourusername/your-repository.git
4.6 Build Triggers
- In the “Build Triggers” section, select how you want to trigger the job. For example, you can choose:
- “Poll SCM”: Check the repository for changes at specified intervals.
- “Build periodically”: Schedule builds at regular intervals.
- “GitHub hook trigger for GITScm polling”: Trigger builds via webhooks when changes are pushed to the repository.
4.7 Build Environment
- You can configure the build environment according to your requirements. For instance, you might want to:
- Add the option “Use secret text(s) or file(s)” for managing sensitive data.
- Check “Delete workspace before build starts” to ensure a clean workspace.
4.8 Build Steps
- In the “Build” section, click on “Add build step.”
- Select a build step based on your project type. For instance, if you are using a shell command, choose “Execute shell.”
Enter the commands you want to execute. For example, you can run a simple script:
echo "Building my first Jenkins job!"
4.9 Post-build Actions
- In the “Post-build Actions” section, you can specify actions that should occur after the build. For example:
- “Email Notification”: Send an email if the build fails.
- “Publish JUnit test result report”: Publish test results to Jenkins.
5. Saving and Running the Job
- After configuring all necessary settings, click “Save” at the bottom of the page.
- You will be redirected to the job configuration page. Click “Build Now” in the left sidebar to trigger the job.
6. Monitoring Job Execution
- Once the job starts, you can monitor its execution in the “Build History” section on the left sidebar.
- Click on the build number (e.g.,
#1) to see detailed information about the build process, including console output. - Review the logs for any errors or successful messages.
Conclusion
Congratulations! You have successfully set up your first Jenkins job. In this post, we covered the process of creating a job, configuring its settings, and running it. Jenkins provides extensive capabilities for automating your development workflows, and this is just the beginning. In future posts, we will explore more advanced features and techniques to enhance your CI/CD processes.