

Virtual machines (VMs) offer a flexible environment, but sometimes you need more storage than the initial setup provides. The Ubuntu Server image I published includes only a 40GB system disk, which is ideal for lightweight installations but can quickly fill up when storing larger files or databases. Adding an extra virtual hard disk is a great way to separate your data from the system disk, making your setup more scalable and organized. This guide explains how to add a new virtual hard disk to an Ubuntu Server running on VMware Fusion or VMware Workstation. We’ll walk through configuring the disk from the command line, partitioning, formatting, mounting, and setting it up for auto-mounting on boot.
Prerequisites
Ensure the following before starting:
- You have an Ubuntu Server virtual machine running on VMware Fusion or VMware Workstation. You can download on from my previous post.
- Access to VMware Fusion or VMware Workstation to add a new virtual disk.

Step 1: Add a New Virtual Hard Disk in VMware
- Power off the VM and navigate to the VM settings.
- Add a New Hard Disk:
- In VMware Fusion, click Virtual Machine > Settings > Add Device > Hard Disk.
- In VMware Workstation, go to VM > Settings > Add > Hard Disk.

- Select the Disk Type and Specify Disk Size:
- Choose a SCSI or SATA disk (recommended) and specify a size for the new virtual disk.
- Finish the setup and start the VM.
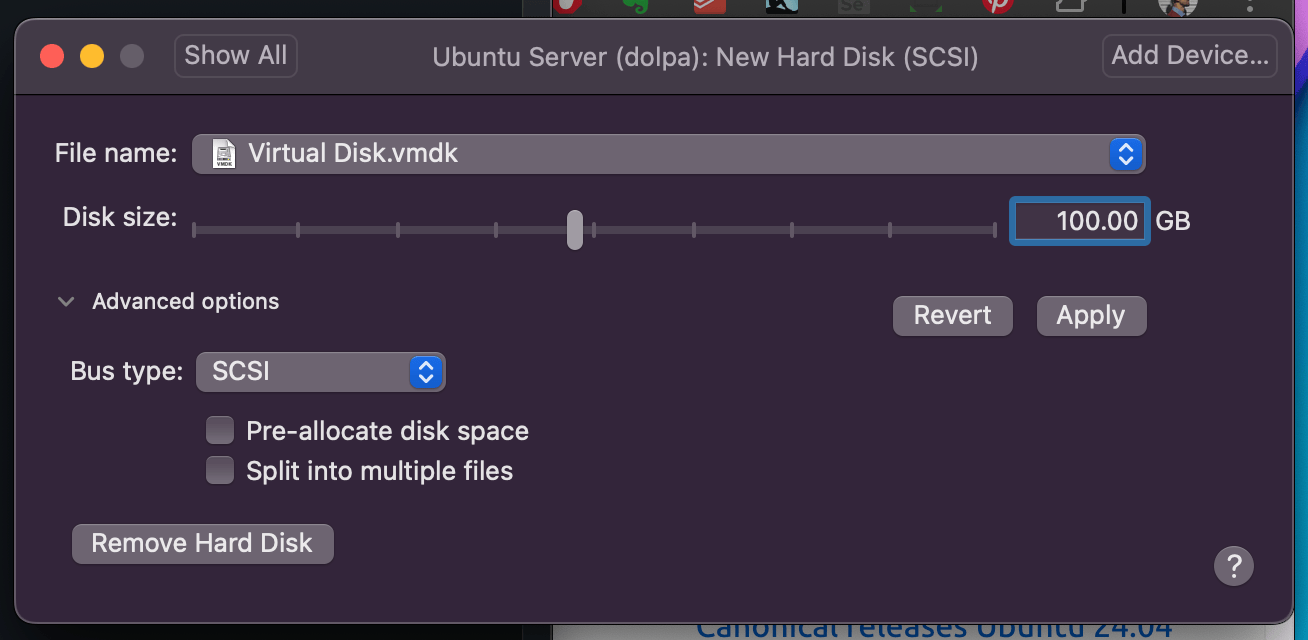
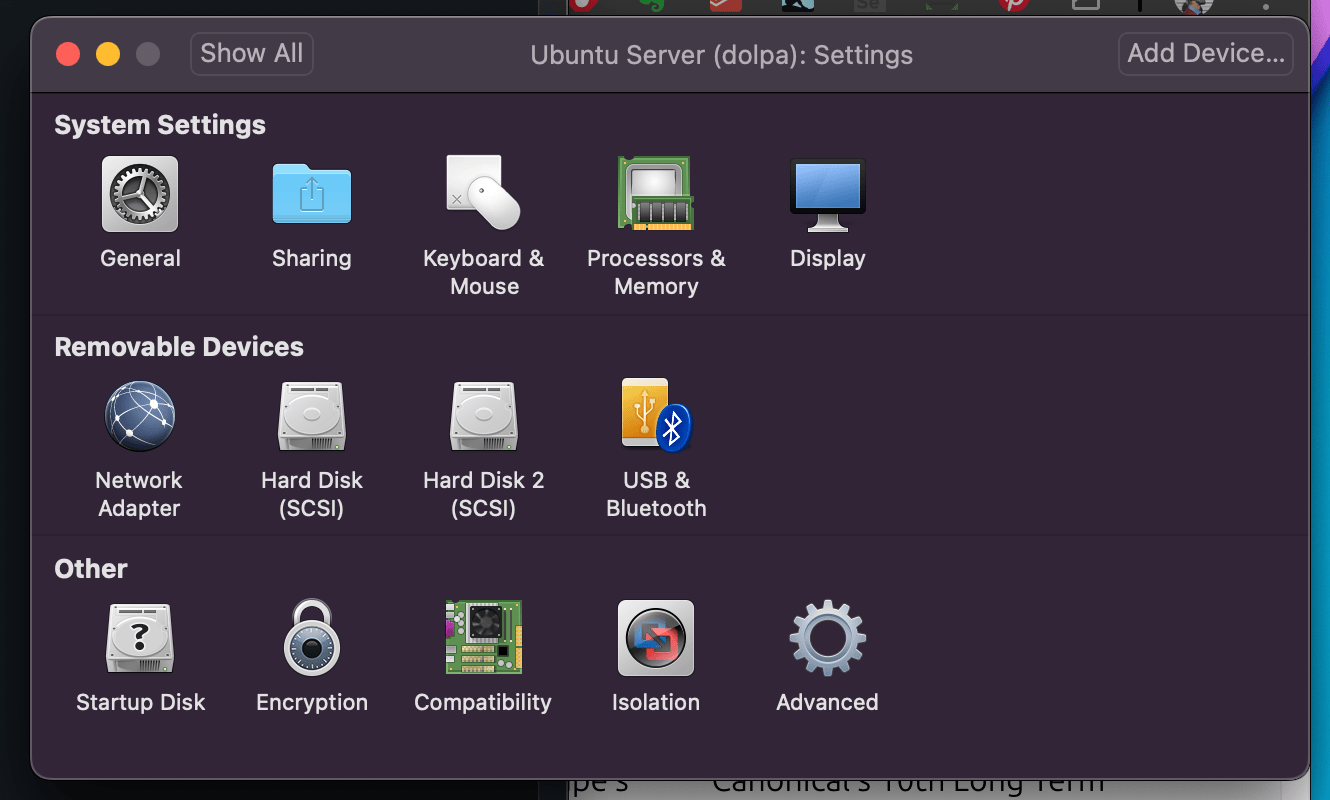
Once you start the VM, Ubuntu should recognize the new disk, which we’ll configure next, and you will see it in the Settings, Hard Disk 2 (SCSI):
Step 2: Detect the Disk in Ubuntu
In your Ubuntu VM, open a terminal to check if the new virtual disk is recognized:
# List all connected disks
lsblk
The new disk will typically appear as /dev/sdX (e.g., /dev/sdb). Take note of this device name as we’ll use it to partition and format the disk.
Step 3: Partition the Disk
To prepare the disk for use, we need to partition it. Use fdisk for partitioning. Replace /dev/sdX with your new disk’s identifier.
# Begin partitioning
sudo fdisk /dev/sdb
In the fdisk interactive session:
- Press
nto create a new partition. - Select
pfor primary, then choose1for the first partition. - Use the default values for the start and end sectors, or specify a size.
- Press
wto write the partition table to the disk and exitfdisk.
Run lsblk to confirm that the partition (/dev/sdb1) has been created.
Output:
Command (m for help): n
Partition type
   p   primary (0 primary, 0 extended, 4 free)
   e   extended (container for logical partitions)
Select (default p):

Using default response p.
Partition number (1-4, default 1):
First sector (2048-209715199, default 2048):
Last sector, +/-sectors or +/-size{K,M,G,T,P} (2048-209715199, default 209715199):

Created a new partition 1 of type 'Linux' and of size 100 GiB.

Command (m for help):
For more information about how to use fdisk, press m for manual:
Command (m for help): m

Help:

  DOS (MBR)
   a   toggle a bootable flag
   b   edit nested BSD disklabel
   c   toggle the dos compatibility flag

  Generic
   d   delete a partition
   F   list free unpartitioned space
   l   list known partition types
   n   add a new partition
   p   print the partition table
   t   change a partition type
   v   verify the partition table
   i   print information about a partition

  Misc
   m   print this menu
   u   change display/entry units
   x   extra functionality (experts only)

  Script
   I   load disk layout from sfdisk script file
   O   dump disk layout to sfdisk script file

  Save & Exit
   w   write table to disk and exit
   q   quit without saving changes

  Create a new label
   g   create a new empty GPT partition table
   G   create a new empty SGI (IRIX) partition table
   o   create a new empty MBR (DOS) partition table
   s   create a new empty Sun partition table
Step 4: Format the Partition
Once the partition table is created on the new disk, you’ll see a device file, such as /dev/sdb1, which represents the first partition on that disk. This device file acts as a reference point for your new storage, making it easy to identify and format the partition before mounting it in your system.
Now, format the partition to the ext4 filesystem:
# Format the partition
sudo mkfs.ext4 /dev/sdb1
Replace /dev/sdb1 with the actual partition identifier.
sudo mkfs.ext4 /dev/sdb1
mke2fs 1.47.0 (5-Feb-2023)
Creating filesystem with 26214144 4k blocks and 6553600 inodes
Filesystem UUID: b43d1e85-5ede-4dfc-a110-384ea0fd16f8
Superblock backups stored on blocks:
	32768, 98304, 163840, 229376, 294912, 819200, 884736, 1605632, 2654208,
	4096000, 7962624, 11239424, 20480000, 23887872

Allocating group tables: done
Writing inode tables: done
Creating journal (131072 blocks): done
Writing superblocks and filesystem accounting information: done
Step 5: Mount the New Disk
To use the new disk, create a mount point and mount the partition:
# Create mount point
sudo mkdir -p /DATA

# Mount the partition
sudo mount /dev/sdb1 /DATA
Confirm that the disk is mounted:
# Check mounted filesystems
df -h
Filesystem                         Size  Used Avail Use% Mounted on
tmpfs                              387M  1.4M  386M   1% /run
/dev/mapper/ubuntu--vg-ubuntu--lv   38G  6.6G   29G  19% /
tmpfs                              1.9G     0  1.9G   0% /dev/shm
tmpfs                              5.0M     0  5.0M   0% /run/lock
/dev/sdb1                           98G   24K   93G   1% /DATA
/dev/sda2                          2.0G  182M  1.7G  10% /boot
tmpfs                              387M   12K  387M   1% /run/user/1000
Step 6: Configure Auto-Mounting on Boot
To ensure the disk mounts automatically after a reboot, add it to /etc/fstab. First, get the UUID for the partition:
# Get UUID of the new partition
sudo blkid /dev/sdb1
[sudo] password for dolpa:
/dev/sdb1: UUID="b43d1e85-5ede-4dfc-a110-384ea0fd16f8" BLOCK_SIZE="4096" TYPE="ext4" PARTUUID="398653e1-01"
Open /etc/fstab and add a line for the new partition, using the UUID from the previous step:
# Open /etc/fstab
sudo vim /etc/fstab
Add the following line, replacing UUID with your partition’s UUID:
/dev/disk/by-id/dm-uuid-LVM-OaUydN18v32zvTMccbk2TUgV1R7twOG4UjlgWdci0pIoSYcWkeeHhEUMRJH19BNQ /DATA ext4 defaults 0 2
You can try older style like:
UUID=your-uuid-here /mnt/your-mount-point ext4 defaults 0 2To verify, run:
# Test fstab entries
sudo mount -a
Conclusion
You've successfully added a new hard disk to your Ubuntu server, partitioned, formatted, and configured it to auto-mount on boot. With the storage configured, your server is nearly ready for action. We now have the essential components: virtual hardware, an operating system, and storage, setting up a solid foundation for a fully functional server environment.
In future posts, I’ll walk you through installing various services, transforming this setup into a versatile server ready for any workload. Stay tuned!