

This post is the beginning of a journey. A slightly nerdy, cable-filled, occasionally frustrating journey that starts with a tiny computer and ends with something that looks suspiciously like real infrastructure.
In this series of manuals and blog posts, I’m going to build a mini Raspberry Pi cluster from scratch. We’ll start with the absolute basics — power, networking, operating systems — and slowly move toward containers, orchestration, CI workloads, and small-scale “cloud-like” experiments.
Before we touch a single SD card or type a single command, we need to answer a much simpler question:
What is a Raspberry Pi, what models exist, how do they differ, and how do you choose the right one for your project?
That’s what this first post is about.
What Is a Raspberry Pi?
A Raspberry Pi is a small, affordable, single-board computer that was originally created to promote computer science education. Over time, it escaped the classroom, wandered into homelabs, and is now quietly running an alarming number of things it was never supposed to.
At its core, a Raspberry Pi is just a computer. It has a CPU, some RAM, networking, USB ports, and storage — all squeezed onto a board roughly the size of a credit card. It doesn’t look like a traditional server. It doesn’t feel like one either. But it runs Linux, and that single fact dramatically expands what it can do.
If you can run Linux on it, you can experiment with it. If you can experiment with it, you can learn from it. And if it’s cheap enough that you’re not afraid to break it, learning becomes much more interesting.
| Feature | What it means for you |
|---|---|
| System-on-Chip (SoC) | A compact, low-power CPU + GPU + RAM on a single chip. |
| ARM Architecture | Runs Linux, BSD, and a growing number of other OSes (including Windows IoT). |
| GPIO Header | 40-pin breakout for sensors, motors, LEDs, and virtually any hardware you can think of. |
| USB-C Power (Pi 4+) | Modern, reversible connector, easy to source quality power supplies. |
| Community & Ecosystem | Thousands of tutorials, libraries, add-on boards (HATs), and ready-made images. |
| Price-to-Performance | One of the cheapest ways to get a full Linux computer (as low as $10 for Zero 2 W). |
In short, a Raspberry Pi is a tiny, affordable, fully‑functional computer that you can program, network, and embed in almost any project.
Think of a Raspberry Pi as a Linux server that accidentally became friendly.
Why Raspberry Pi Is So Popular (and Why That Matters)
The Raspberry Pi Foundation had a deceptively simple idea: computers should be cheap enough that people aren’t afraid to break them.
That one idea explains almost everything about Raspberry Pi’s success.
When hardware is affordable, experimentation increases. Fear decreases. Mistakes stop being disasters and start being lessons. You’re more likely to try something new, more likely to rebuild from scratch, and more likely to actually understand what’s going on under the hood.
This is exactly why Raspberry Pi became so popular in homelabs, DevOps experiments, automation testing, and cluster learning. It lets you ask “what happens if I do this?” and then actually do it — without worrying about burning money or hardware.
Which is perfect, because that’s exactly what we’re going to do.
Raspberry Pi Models: A Practical Overview
Over the years, Raspberry Pi hardware has evolved a lot. Some models are great for learning clusters. Some are better suited for embedded projects. And some should probably stay in a drawer unless you already own them.
Let’s go through the most relevant ones.
Raspberry Pi Model Comparison (2021 – 2025)
| Model | CPU | RAM | Net | Power | Price | Typical Use | Notes |
|---|---|---|---|---|---|---|---|
| Pi Zero 2 W (2021) | 4c A53 @1GHz | 512MB | Wi-Fi | 5V 1A | $15 | IoT, sensors | Smallest full Linux Pi |
| Pi Zero 2 W Plus (2024) | Same | 512MB | Wi-Fi | Same | $20 | Camera / HDMI projects | Adds CSI + mini-HDMI |
| Pi 3 B+ (2018) | 4c A53 @1.4GHz | 1GB | 100M | 5V 2.5A | $35 | Legacy servers | USB-2 Ethernet bottleneck |
| Pi 4 B rev 1 (2019) | 4c A72 @1.5–2GHz | 1–4GB | 100M | 5V 3A | $35–55 | General purpose | USB-3, dual display |
| Pi 4 B rev 2 (2022) | Same | 1–8GB | 1G | Same | $35–80 | Small servers | True gigabit Ethernet |
| Pi 4 B 8GB (2025) | Same | 8GB | 1G | Same | $80 | AI / HPC | Best memory option |
| Pi 400 (2020) | 4c A72 @1.8GHz | 4GB | 100M | 5V 3A | $70 | Desktop / labs | Keyboard + cooling |
Raspberry Pi 3 (Model B and B+)
Once upon a time, this was the Raspberry Pi. Many people still have one lying around, quietly judging them from a shelf.
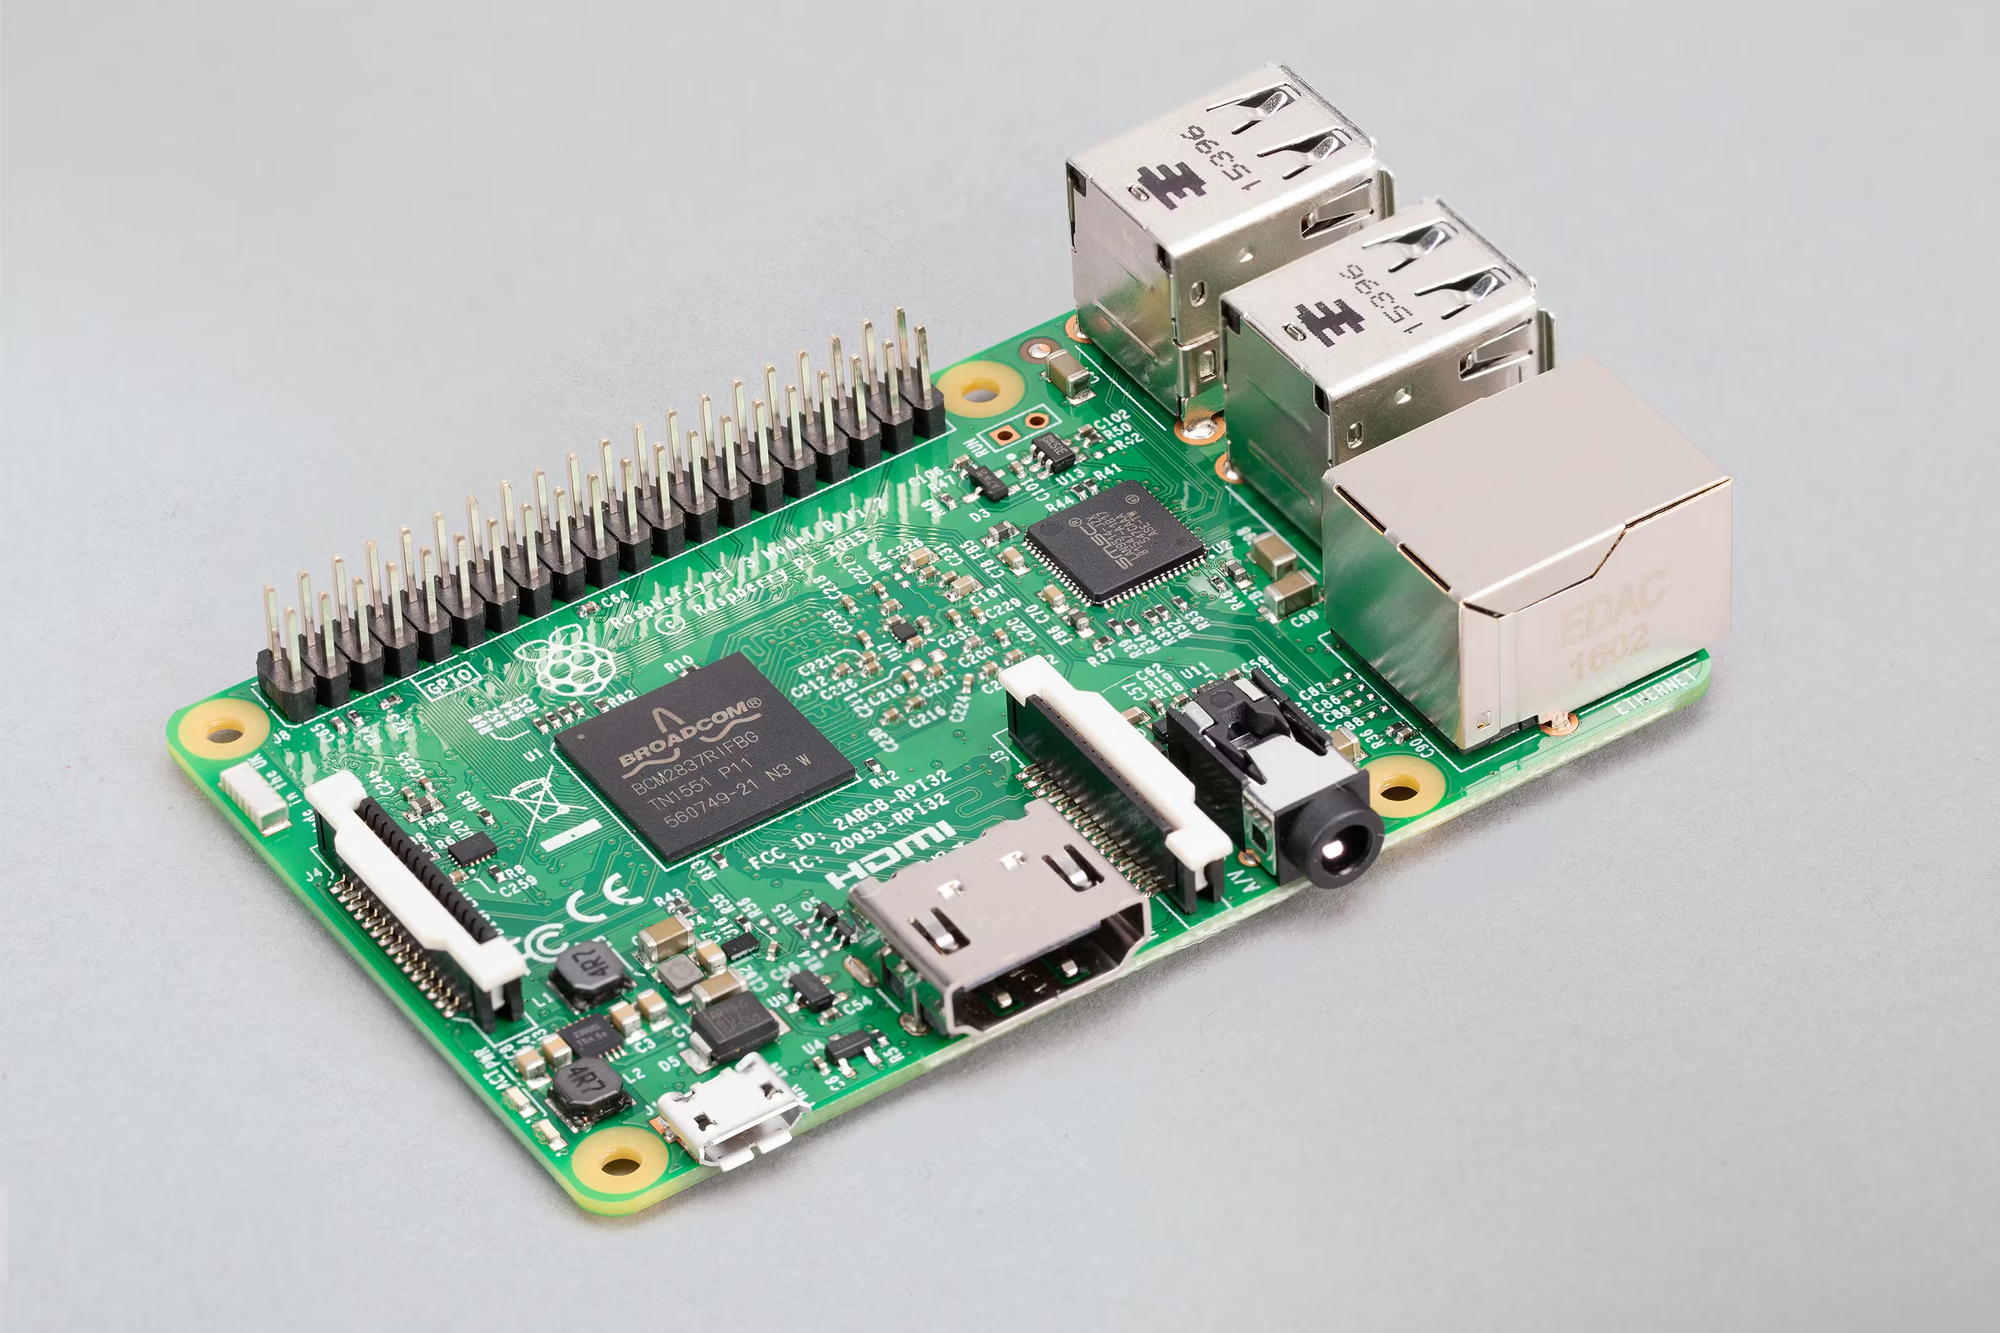
It comes with a quad-core ARM CPU, 1 GB of RAM, USB 2.0 ports, and Ethernet limited to 100 Mbps (shared with USB). It boots from an SD card and consumes very little power.
The good news is that it’s cheap, stable, and extremely well supported. The bad news is that modern workloads have moved on. One gigabyte of RAM and slow networking make it a poor choice for container-heavy or orchestration-focused projects.
It still works, but it’s not what I’d recommend for building a new cluster unless you already own several and enjoy constraints.
Raspberry Pi 4 (Model B)
This is where Raspberry Pi stopped being “cute” and started being serious.
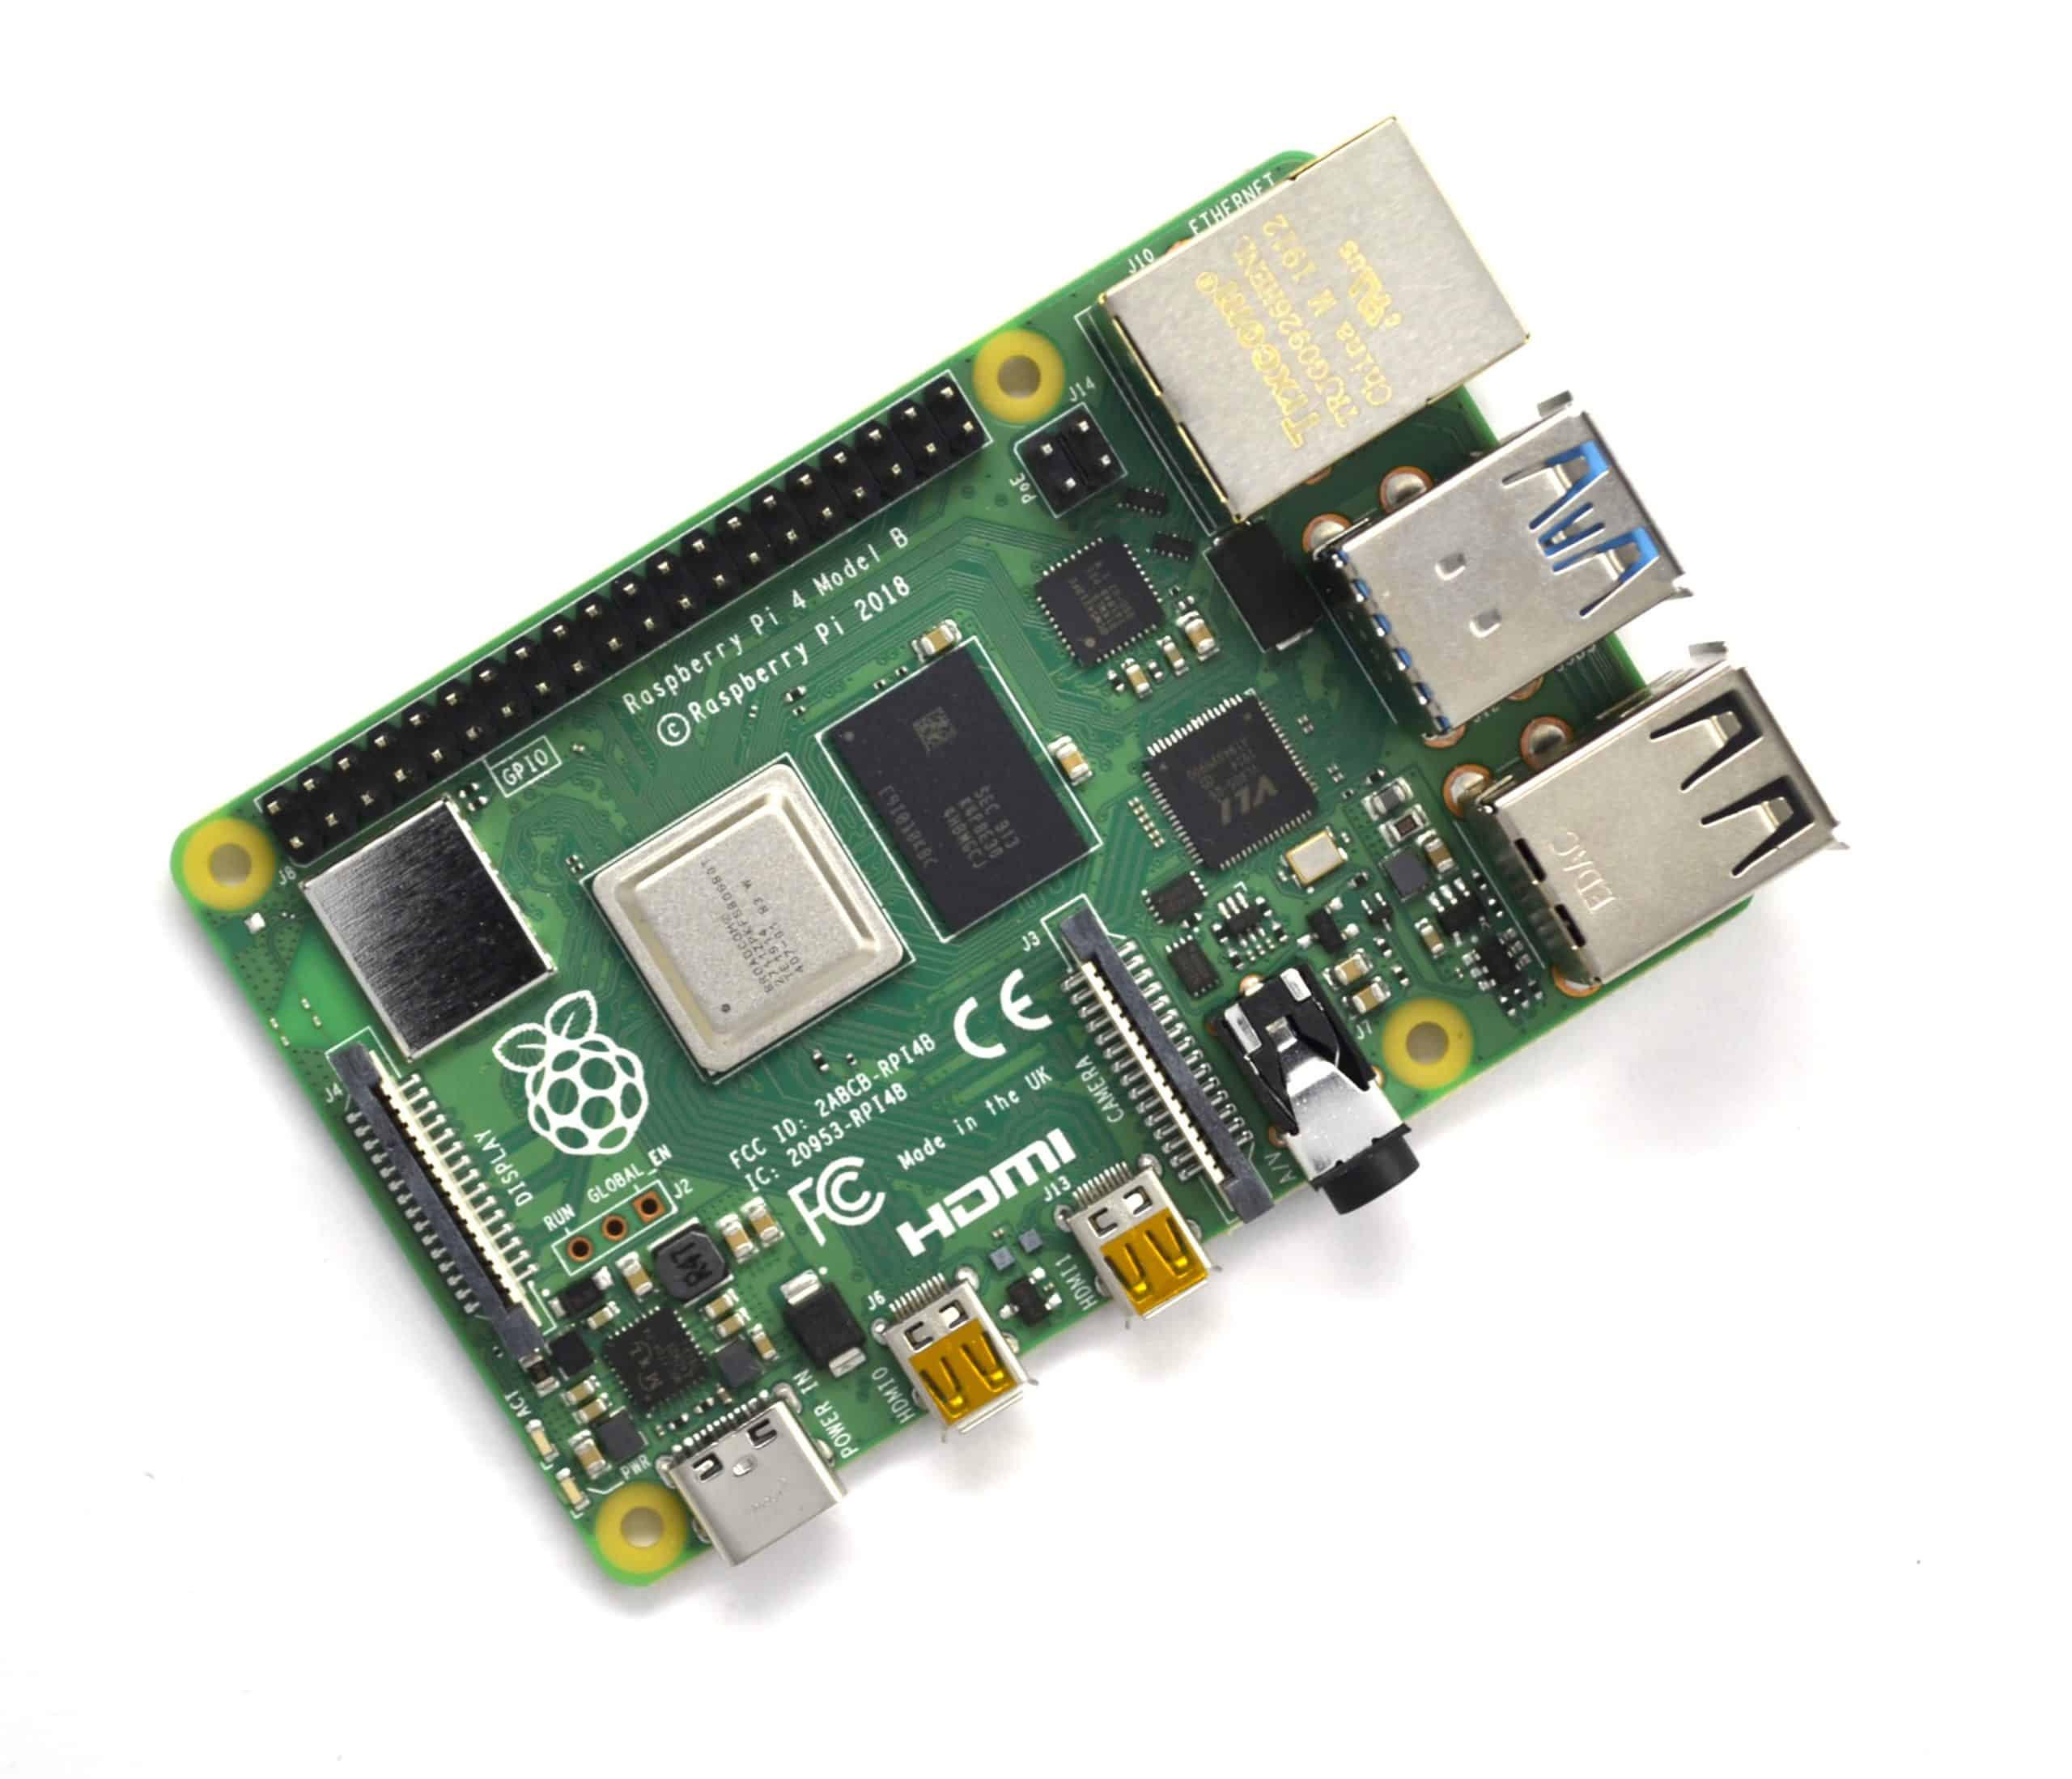
The Raspberry Pi 4 introduced proper Gigabit Ethernet, USB 3.0, significantly better CPU performance, and multiple RAM options ranging from 2 GB to 8 GB. It also supports booting from USB storage, which means you can use fast and reliable SSDs instead of SD cards.
This single change — USB-based SSD boot — makes a massive difference in stability and performance. Suddenly, Raspberry Pi starts behaving less like a toy and more like a small, respectable server.
The downside is that it needs proper cooling and a reliable power supply. You can’t just plug it into any random phone charger and hope for the best anymore.
For most projects, this is the sweet spot: powerful enough, affordable enough, and extremely well supported.
Raspberry Pi 5
The Raspberry Pi 5 is the newest generation and a noticeable leap forward. Faster CPU, improved I/O, and support for PCIe expansion make it the most capable Raspberry Pi so far.
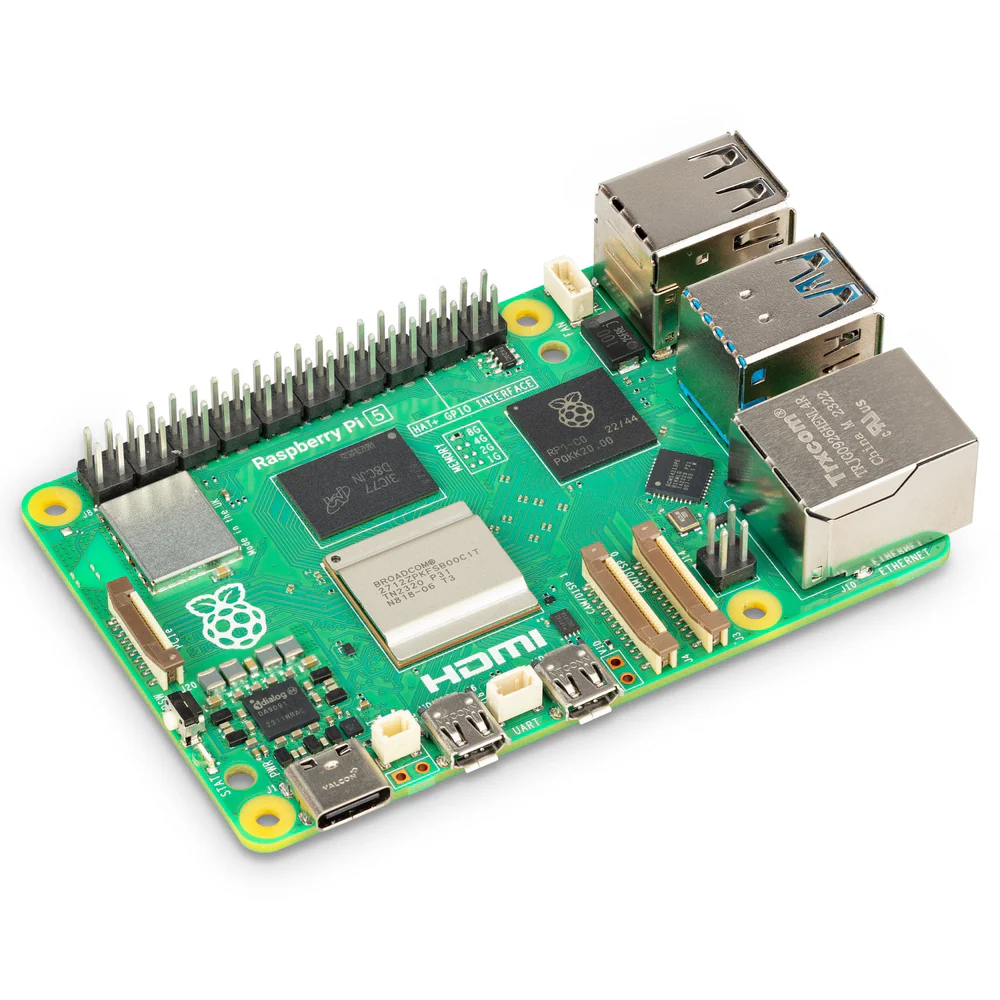
It’s more powerful, more future-proof, and better suited for heavier workloads. At the same time, it’s more expensive, draws more power, and absolutely requires good cooling.
If you want maximum performance per node and don’t mind paying a bit more attention to power and thermals, this is an excellent choice.
Raspberry Pi Zero and Zero 2
Tiny. Cheap. Adorable.
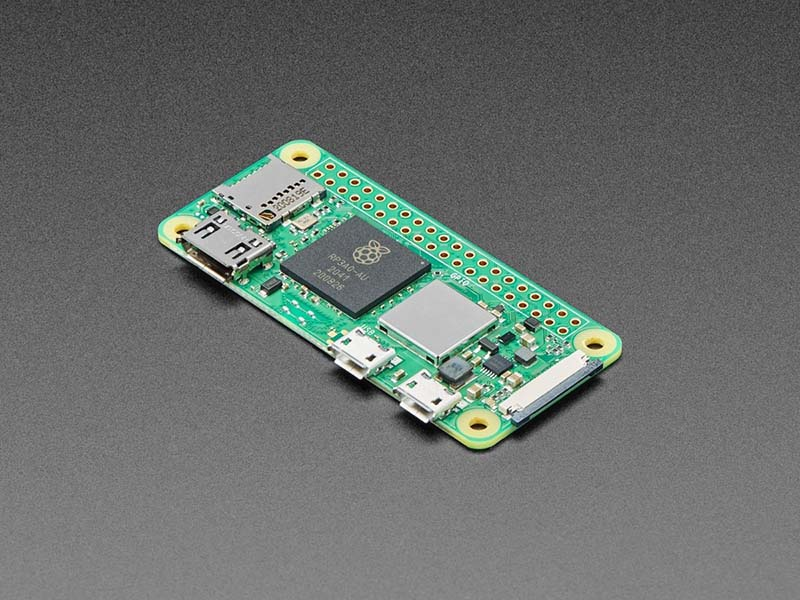
These boards are fantastic for embedded projects, sensors, and lightweight tasks. They are not fantastic for clusters. Limited RAM, limited networking, and limited I/O make them a poor fit for orchestration, CI workloads, or anything that involves multiple services.
They’re great at what they’re meant for. A cluster is not one of those things.
How to Choose the Right Raspberry Pi for Any Project
Determine the core requirements
| Model | CPU | RAM | USB | Net | Power | Price | Typical Use |
|---|---|---|---|---|---|---|---|
| Pi Zero 2 W (2021) | 4c @1GHz | 512MB | 1× OTG | Wi-Fi | 5V 1A | $15 | IoT, sensors |
| Pi Zero 2 W Plus (2024) | Same | 512MB | OTG | Wi-Fi | Same | $20 | Camera / HDMI |
| Pi 3 B+ (2018) | 4c @1.4GHz | 1GB | 4× USB2 | 100M | 5V 2.5A | $35 | Legacy servers |
| Pi 4 B (2019–22) | 4c A72 @1.5–2GHz | 1–8GB | 2× USB2 + 2× USB3 | 1G* | 5V 3A | $35–80 | General use |
| Pi 4 B (8GB) (2025) | Same | 8GB | Same | 1G | Same | $80 | AI / HPC |
| Pi 400 (2020) | 4c @1.8GHz | 4GB | Same | 100M | Same | $70 | Desktop / labs |
| Pi 5 (rumoured) | — | — | — | — | — | — | Expected 2026 |
Here’s the most important rule you should remember:
Choose the weakest hardware that still lets you learn comfortably.
If you already have Raspberry Pi 3 boards and want to experiment with basic services, they can still be useful. If you want a balanced, reliable platform for containers and automation, Raspberry Pi 4 is an excellent choice. If you want maximum performance and future-proofing, Raspberry Pi 5 is the best option.
For this project, I’ll be using Raspberry Pi 3, just because I already have some from my previous projects.
Learning is fun. Fighting constant resource limits is less so.
Hardware Components We’ll Need
To build this cluster, we’ll need eight Raspberry Pi boards, storage for each node (just SD cards), an Ethernet Hub, and network cables.
Power and cooling, a few fans, and short USB cables will do the job. Unofficial power supplies, nothing fancy, just with enough power and USB ports. Some small heatsinks on the main chips, no active cooling. That will not be optional for Raspberry Pi 4 and 5 models.
Optional but highly recommended items include a cluster case or rack, labels for identifying nodes, and a UPS. Power outages have an impressive sense of timing.
What I’m Going to Build
Now that we’ve covered what a Raspberry Pi is and how to choose one, let’s talk about the actual plan.
I’m going to build a mini cluster of eight Raspberry Pi nodes.
Why eight? Not because it’s magical, but because it’s practical. It’s enough nodes to simulate real cluster behavior, small enough to fit on a desk, and large enough to break things properly.
- Balanced Power‑to‑Cost Ratio – 8 is a sweet spot: big enough to see real scaling, still cheap enough for a hobby project.
- Physical Layout – 8 Pi 4s fit nicely in a 2 × 4 grid or a single‑row rack (you can 3‑D‑print a small case).
- Network Simplicity – One 8‑port Gigabit switch handles all traffic without requiring link‑aggregation.
- Scalable – You can later expand to 12 or 16 nodes by buying another identical set of parts.
This cluster will be fully networked, automated, reproducible, and occasionally misbehaving. In other words, it will behave exactly like real infrastructure.
What Can You Do With a Mini Raspberry Pi Cluster?
Quite a lot, actually.
This cluster can be used as a Kubernetes learning environment, a Docker and Docker Swarm playground, a CI/CD platform with Jenkins agents, and a general infrastructure lab. It’s perfect for experimenting with automation, monitoring, logging, and cloud concepts — without cloud bills.
Over this series, the cluster will be used to explore:
- Network bootstrapping
- Static and dynamic IP management
- Automated OS installation
- Ansible-based configuration
- Docker and Docker Compose
- Kubernetes (lightweight distributions)
- Jenkins build agents
- CI/CD pipelines
- Monitoring and logging
- Failure testing (because things will fail)
All of this on hardware that costs less than a decent keyboard.
It’s also excellent for breaking things safely, which is a surprisingly important skill.