

In my previous posts, we explored what Jenkins is, how to install and configure it, and even launched a Jenkins server locally using Docker Compose. We also got acquainted with Jenkins Pipelines and examined the difference between the Declarative and Scripted styles of pipelines.
Today, we’ll take a practical step forward: we will create our first real Declarative Pipeline. This pipeline will serve as a template for all subsequent jobs in your CI/CD setup. By the end of this guide, you’ll have a working Jenkins pipeline that builds, tests, and deploys a product. We’ll also demonstrate how to move your pipeline code into a Git repository for better version control and collaboration.
1. What is a Jenkins Pipeline?
A Jenkins Pipeline is a series of steps that Jenkins uses to build, test, and deploy software. Pipelines are essential for automating your CI/CD processes (Continuous Integration and Continuous Delivery/Deployment).
1.1 Declarative vs. Scripted Pipeline
- Declarative Pipeline: A simpler, structured syntax designed for readability and ease of use. It uses a clean block-based format.
- Scripted Pipeline: A more flexible, Groovy-based syntax allowing advanced custom scripting.
For most practical scenarios, the Declarative style is sufficient, and that’s what we’ll focus on in this guide.
If you're unsure about the differences between Declarative and Scripted pipelines, check out my previous post on the Pros and Cons of Declarative vs Scripted Pipelines and another post on the Basic Jenkinsfile Syntax for Both Declarative and Scripted Pipelines to help you decide which style suits your project best.
2. Prerequisites
Before we begin, ensure the following prerequisites are met:
- Jenkins is installed and running.
If you haven’t installed Jenkins yet, check out my guide on Jenkins 101: Getting Started with Continuous Integration - How to Install Jenkins.
- You have administrative access to your Jenkins instance.
Follow the Installation guide to get access to your Jenkins Server.
- A project or simple script to simulate a "build, test, and deploy" process.
You can create an empty repository on GitHub to play with it or use your current project and just add the Pipeline to it. For more about GitHub registration and repository creation, check How to Register on GitHub and Create a New Repository post.
3. Our Declarative Pipeline Structure
Our pipeline will have the following three key stages:
- Build: Compile or package the product.
- Test: Run tests to ensure the product works correctly.
- Deploy: Deploy the final artifact to a target server or directory.
This structure reflects the fundamental workflow of any CI/CD process. You can adapt it later for more complex requirements.
4. Creating the First Declarative Pipeline
Follow these steps to create a simple pipeline:
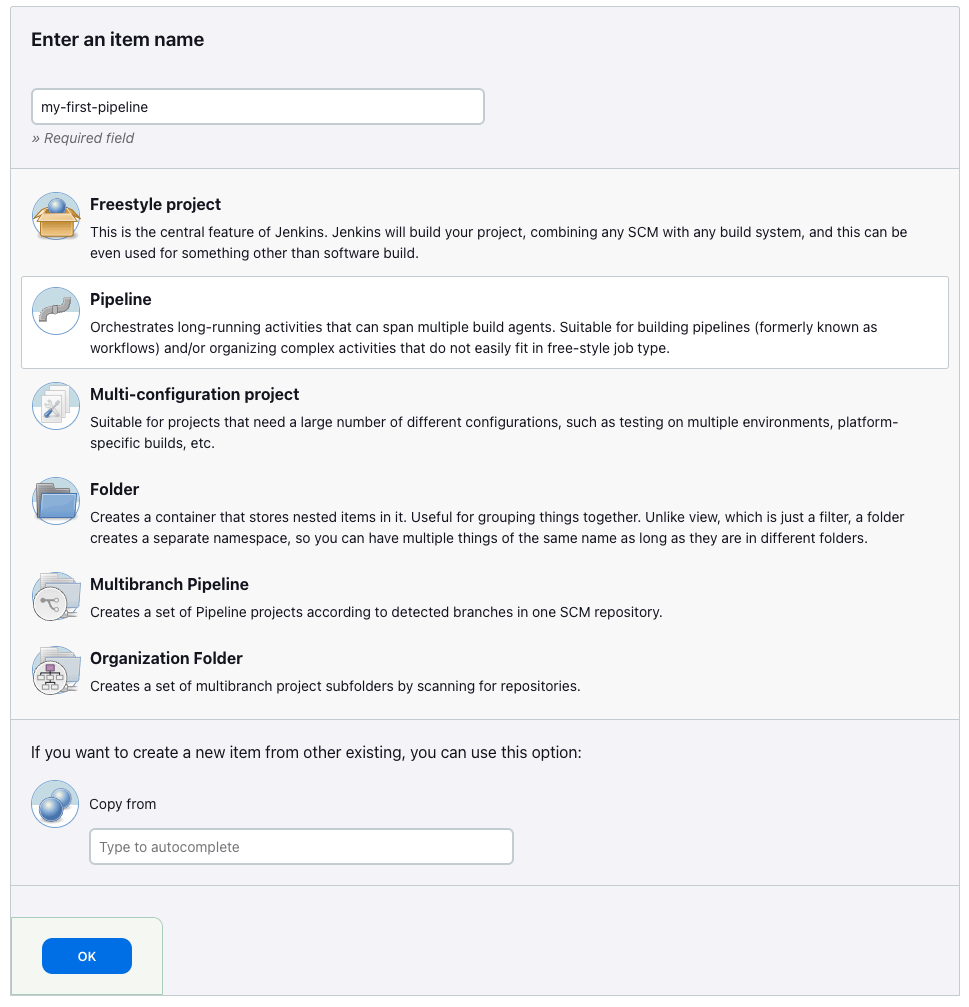
4.1 Step 1: Create a New Pipeline Job in Jenkins
- Log in to your Jenkins dashboard.
- Click on “New Item” at the top of the left sidebar.
- Enter a name for the new job (e.g.,
my-first-pipeline). - Select “Pipeline” as the job type.
- Click “OK” to create the job.
4.2 Step 2: Write the Declarative Pipeline Script
Skip all the other configuration steps for now and go directly to the Pipeline section of the job configuration page. Select “Pipeline script” and copy and paste the following Declarative Pipeline code:
pipeline {
    agent any
    environment {
        BUILD_TOOL = "Maven"   // Example variable for build tools
    }
    stages {
        stage('Build') {
            steps {
                echo 'Building the project...'
                sh 'echo "Compiling code..."'
                sh 'mkdir -p build && echo "Build Complete" > build/output.txt'
            }
        }
        stage('Test') {
            steps {
                echo 'Testing the project...'
                sh 'echo "Running tests..."'
                sh 'sleep 2 && echo "Tests passed successfully!"'
            }
        }
        stage('Deploy') {
            steps {
                echo 'Deploying the artifact...'
                sh 'echo "Deploying to target environment..."'
                sh 'cp build/output.txt /tmp/deployment_output.txt'
            }
        }
    }
    post {
        always {
            echo 'Pipeline execution completed!'
        }
    }
}
4.3 Step 3: Explanation of the Pipeline Code
pipeline {}: Defines the start of the pipeline.agent any: Specifies that the pipeline can run on any available agent.environment: Sets environment variables for the pipeline.stages: Groups the steps into logical stages (Build,Test, andDeploy).steps: Commands or actions executed in each stage.post: Defines actions to perform at the end of the pipeline.

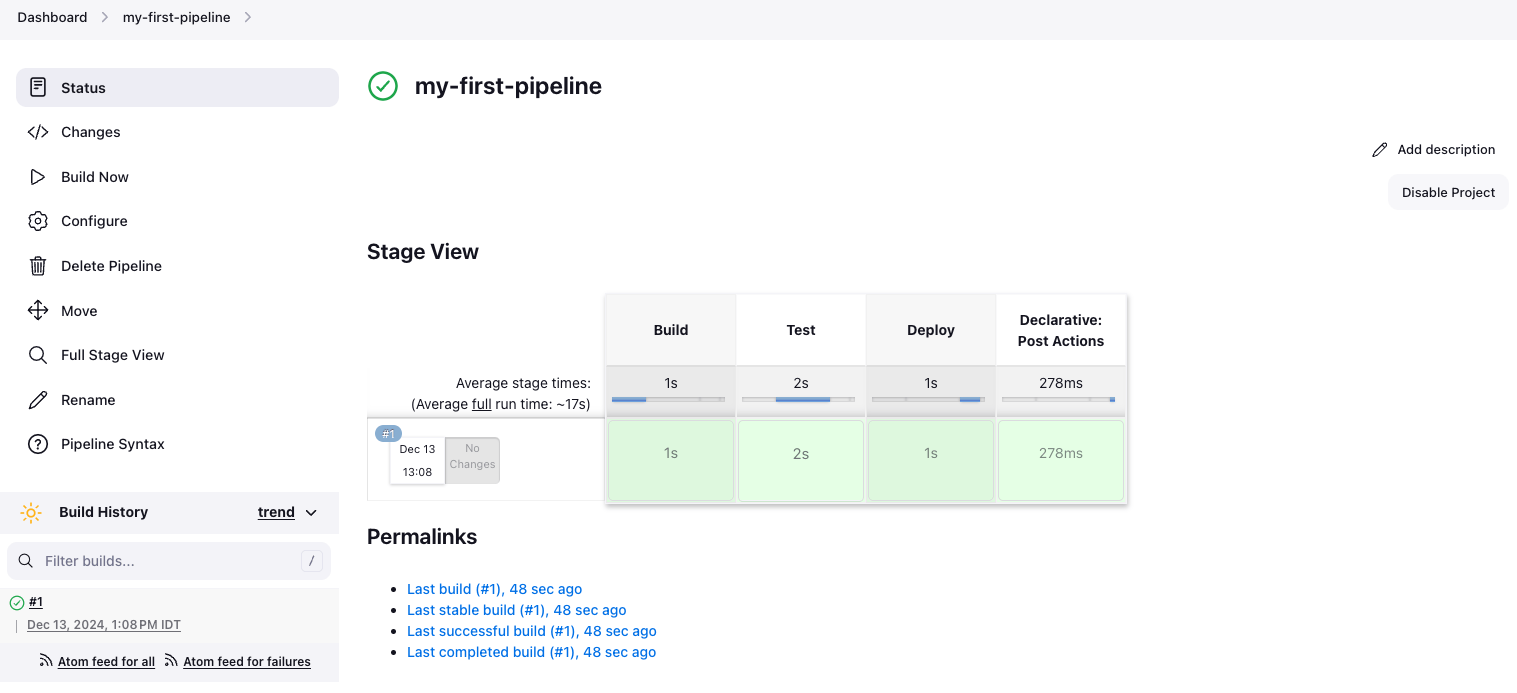
4.4 Step 4: Run the Pipeline
- Save the job configuration and click “Build Now”.
- Monitor the pipeline execution by clicking on the build number.
- Verify that each stage (
Build,Test,Deploy) is completed successfully.
5. Moving the Pipeline Code into a Git Repository
Instead of storing the pipeline code inside Jenkins, a best practice is to store it in a Git repository. This allows version control, collaboration, and easier updates.
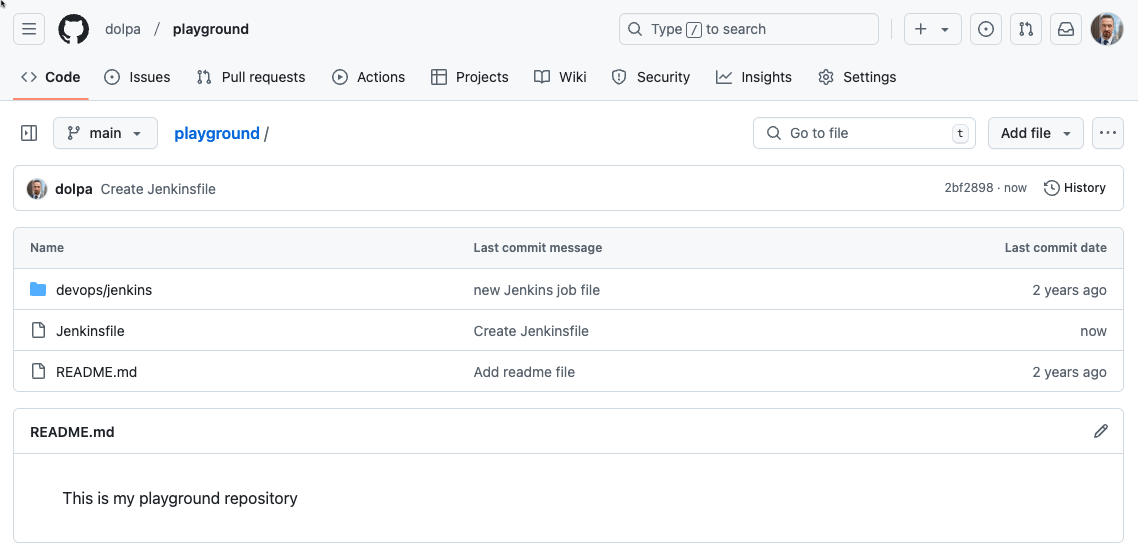
5.1 Step 1: Create a Git Repository
Go to GitHub, GitLab, or Bitbucket and create a new repository (e.g., jenkins-pipelines).
Clone the repository to your local machine:
git clone <repository-url>
cd jenkins-pipelines
5.2 Step 2: Move Pipeline Code to a Jenkinsfile
- Create a new file in the repository root called
Jenkinsfile. - Copy the Declarative Pipeline code into this file.
Save and commit the changes:
git add Jenkinsfile
git commit -m "Add Jenkins Declarative Pipeline"
git push origin main
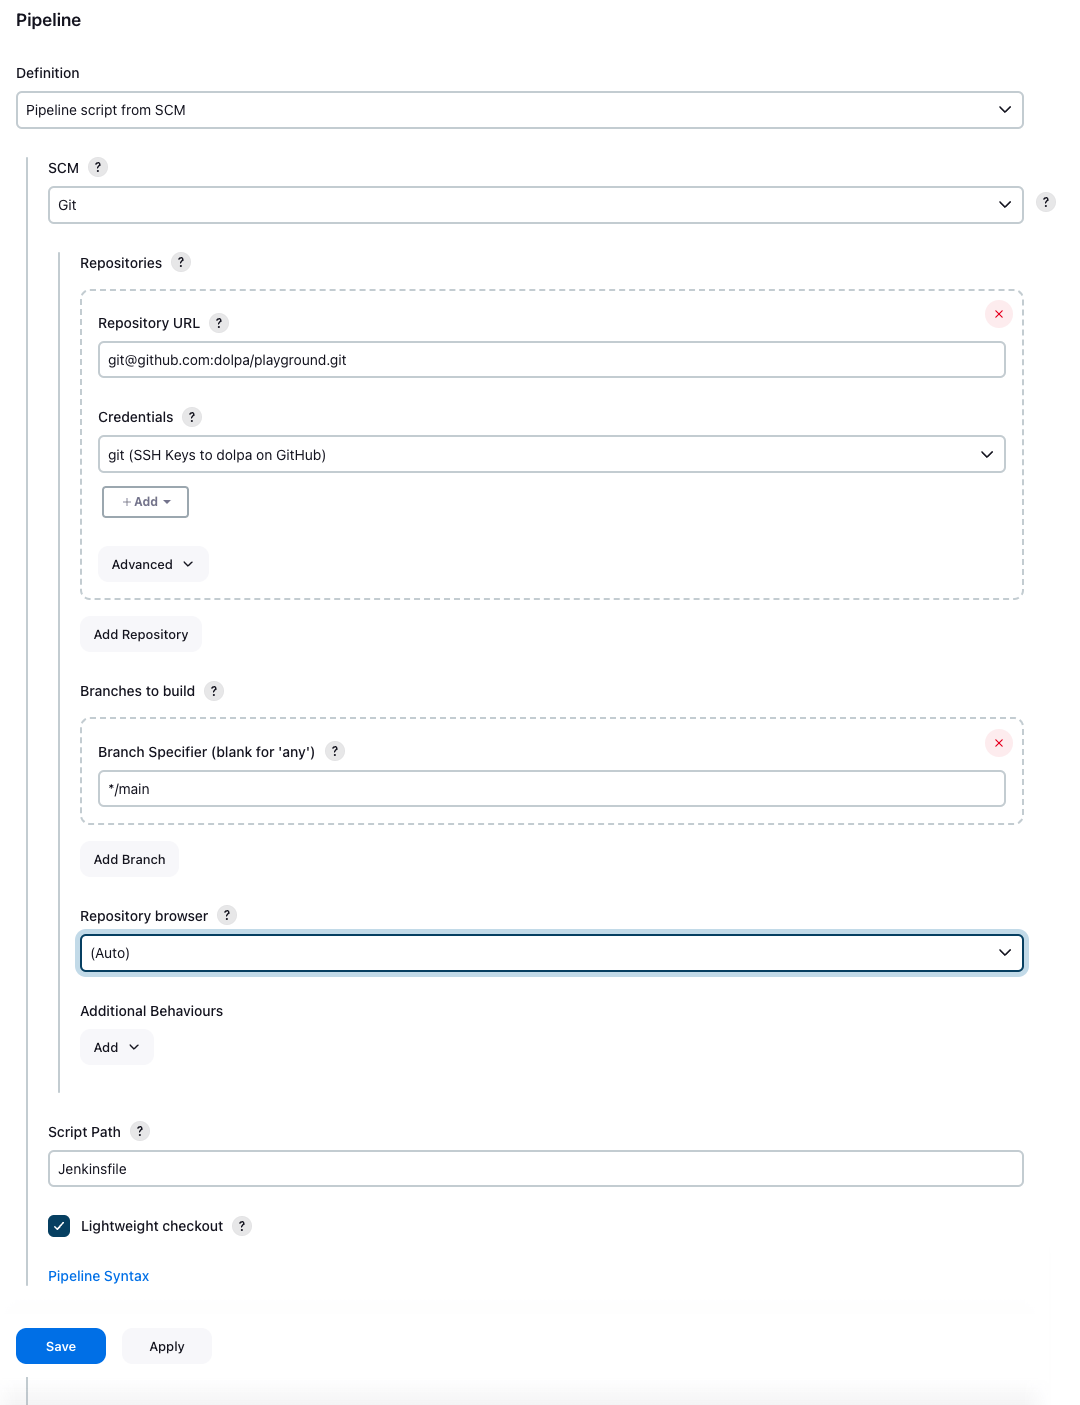
5.3 Step 3: Connect Jenkins to the Repository
- Go to your Jenkins job configuration.
- In the Pipeline section, select “Pipeline script from SCM”.
- Choose Git as the SCM and enter your repository URL.
- Specify the branch to build (e.g.,
main). - Save the configuration.
6. Run the Pipeline from Git
- Trigger the pipeline job by clicking “Build Now”.
- Verify that Jenkins fetches the
Jenkinsfilefrom Git and runs the pipeline successfully.

As you may have noticed, there's an extra step involved: checking out the Pipeline code from the GitHub repository.
Conclusion
In this guide, we created our first Declarative Pipeline in Jenkins, structured into Build, Test, and Deploy stages. We also moved the pipeline code into a Git repository to follow best practices for version control.
By setting up this workflow, you have a solid foundation for automating your CI/CD processes. From here, you can enhance the pipeline with more advanced features like notifications, error handling, and integration with tools like Docker or Kubernetes.
Stay tuned for future posts where we’ll dive deeper into Jenkins Pipelines and advanced CI/CD techniques!