

1. A Short Story About Blind Optimisation
There is a special kind of frustration known to Linux gamers.
You launch a game.
It feels smooth… or maybe it doesn’t.
FPS seems high, but something is off.
The mouse feels heavy. Input lag? CPU bottleneck? GPU power limit? Thermal throttling?
And then comes the classic question:
“Is this game actually running well — or am I just guessing?”
This is where MangoHud enters the story.
MangoHud is not magic.
It does not give you more FPS.
It does not overclock your GPU.
It does not fix bad drivers.
What it does is far more dangerous: It shows the truth.
2. What Exactly Is MangoHud?
MangoHud is a real-time performance overlay for:
- Vulkan
- OpenGL
- (Indirectly) Proton / Steam games
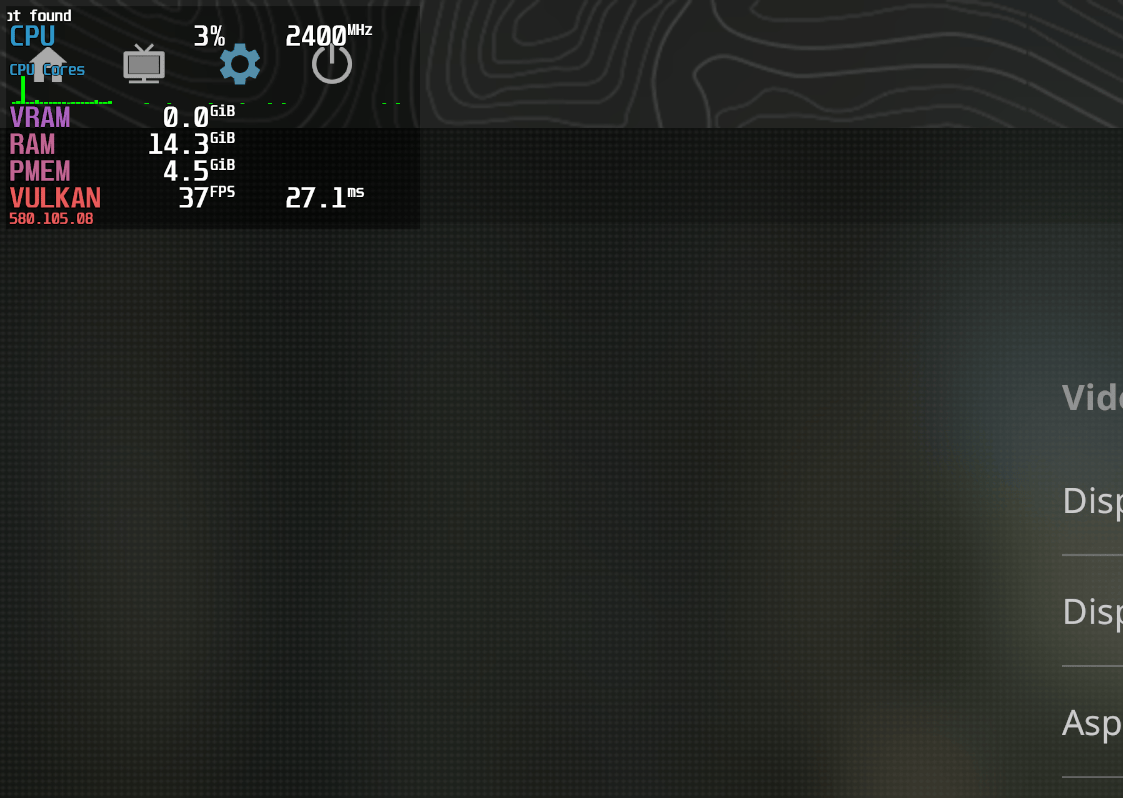
It displays information such as:
- FPS (average, current, min)
- Frame time graph (the most important metric)
- GPU load, clocks, temperature, power usage
- CPU load (per core if you want)
- RAM and VRAM usage
- API (Vulkan / OpenGL)
- Resolution, refresh rate, and more
All of this inside the game, without alt-tabbing.
Think of MangoHud as:
htop + nvidia-smi + a lie detector — but for games
3. Installing MangoHud (The Calm Way)
3.1 Ubuntu / Debian
sudo apt update
sudo apt install mangohud
3.2 Arch / Manjaro
sudo pacman -S mangohud
3.3 Fedora
sudo dnf install mangohud
3.4 Verify Installation
Run:
mangohud glxgears
If text and numbers appear over the spinning gears, congratulations — it’s working. If all you see are gears, congratulations again: but, it’s not working.
4. First Test: MangoHud With glxgears
Before touching Steam, we do something simple and boring.
That’s good.
4.1 Why glxgears?
Because:
- It’s installed almost everywhere
- It uses OpenGL
- If MangoHud works here, it will work in games
4.2 Run glxgears with MangoHud
mangohud glxgears
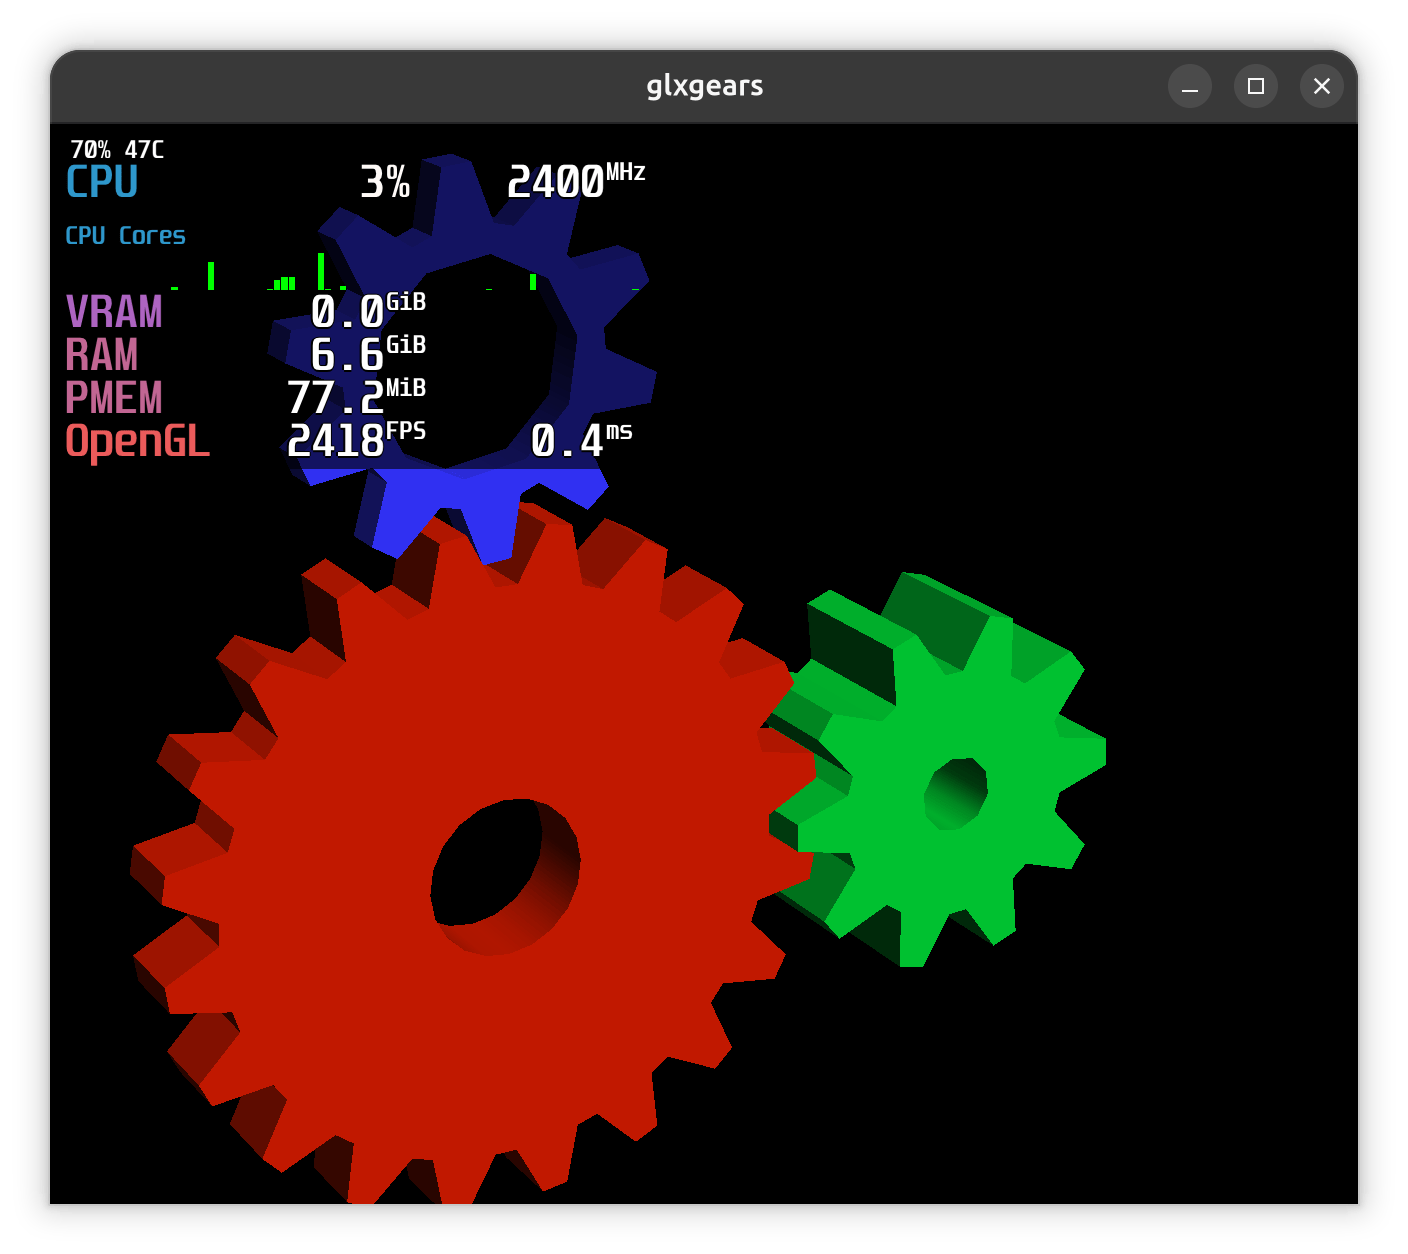
You should see:
- FPS counter
- GPU usage
- API: OpenGL
If you do — MangoHud works.
If not, stop here and fix it before continuing.
To get the full potential from your system and not be limited to the refresh rate of the monitor:
__GL_SYNC_TO_VBLANK=0 mangohud glxgearsOr for the DirectX alternative:
mangohud vkcube --present_mode 0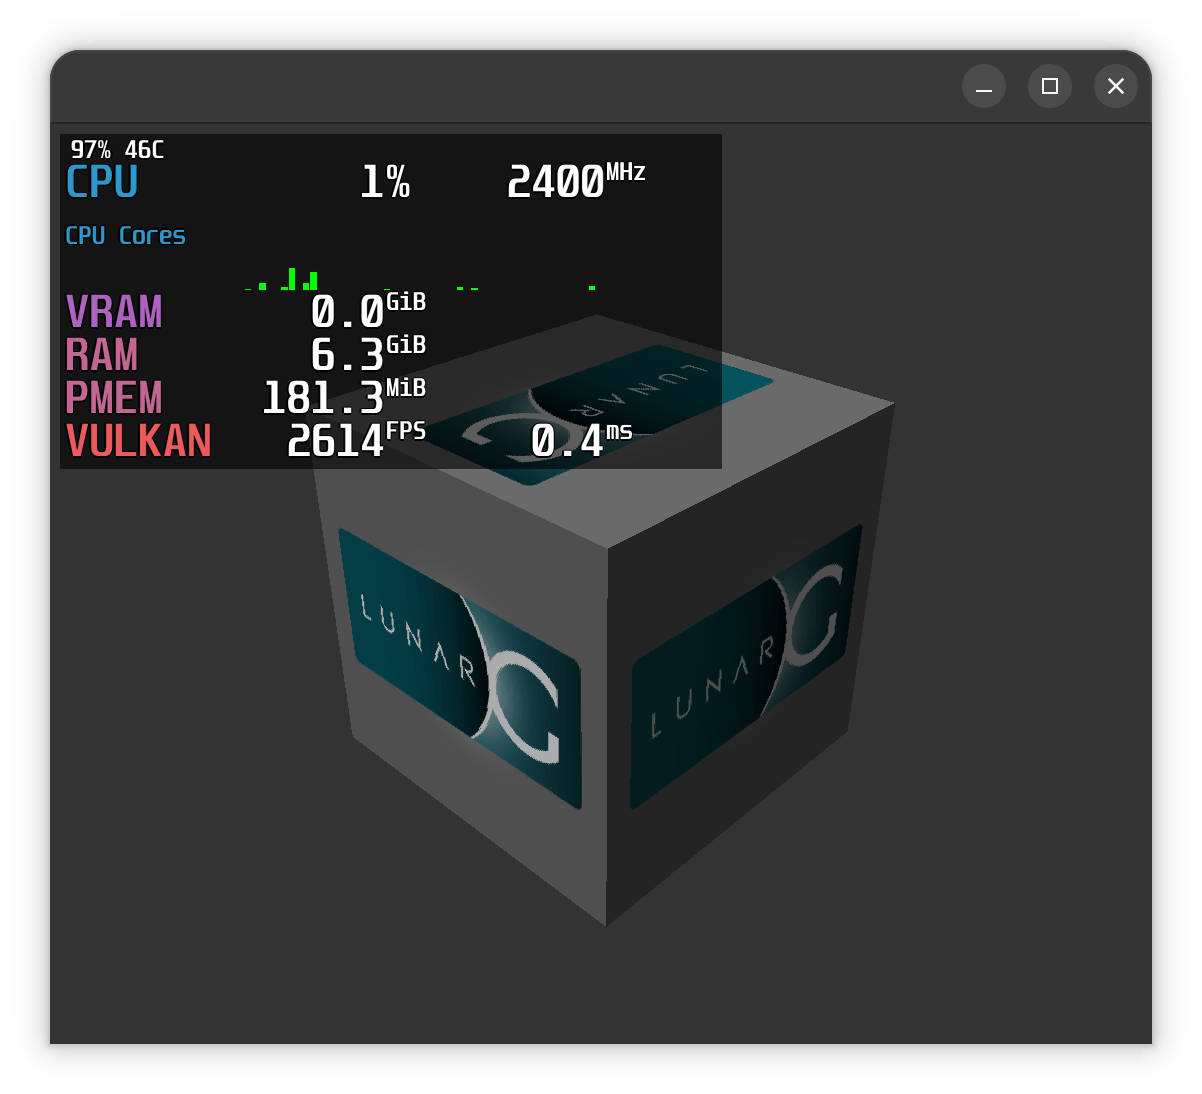
5. Understanding the Overlay (What You’re Actually Seeing)
Before configuring anything, let’s decode the numbers.
5.1 FPS vs Frame Time (Important!)
- FPS: how many frames per second
- Frame time: how long each frame takes to render
Example:
- 60 FPS → ~16.6 ms per frame
- 120 FPS → ~8.3 ms per frame
That’s why MangoHud’s frame time graph is gold.
5.2 GPU Metrics
You may see:
- GPU utilization (%)
- GPU clock (MHz)
- Temperature (°C)
- Power usage (W)
If GPU usage is:
- 99% → GPU-bound
- 40–60% with low FPS → CPU-bound or driver-limited
5.3 CPU Metrics
Depending on config:
- Total CPU load
- Per-core usage
CS2, for example, often hits one core hard and ignores the rest.
MangoHud makes this painfully obvious.
6. Configuring MangoHud (The Right Way)
6.1 Default Config Location
MangoHud reads its configuration from:
~/.config/MangoHud/MangoHud.conf
If it doesn’t exist — create it.
mkdir -p ~/.config/MangoHud
vim ~/.config/MangoHud/MangoHud.conf
6.2 A Clean, Practical Starter Config
fps
frametime
frame_timing=1

gpu_stats
gpu_temp
gpu_power
gpu_load
gpu_clock

cpu_stats
cpu_temp
cpu_load

ram
vram

resolution
refresh_rate
api

position=top-left
font_size=24
background_alpha=0.3
This gives you:
- FPS + frame time graph
- CPU & GPU insight
- Clean and readable layout
No clutter. No nonsense.
6.3 Reload Config Without Restarting
Press inside a game:
Shift + F12
This toggles MangoHud on/off and reloads config.
7. Using MangoHud With Steam Games
Now the fun part.
7.1 The Steam Launch Option Method (Recommended)
Open:
- Steam → Game → Properties → Launch Options
Add:
mangohud %command%
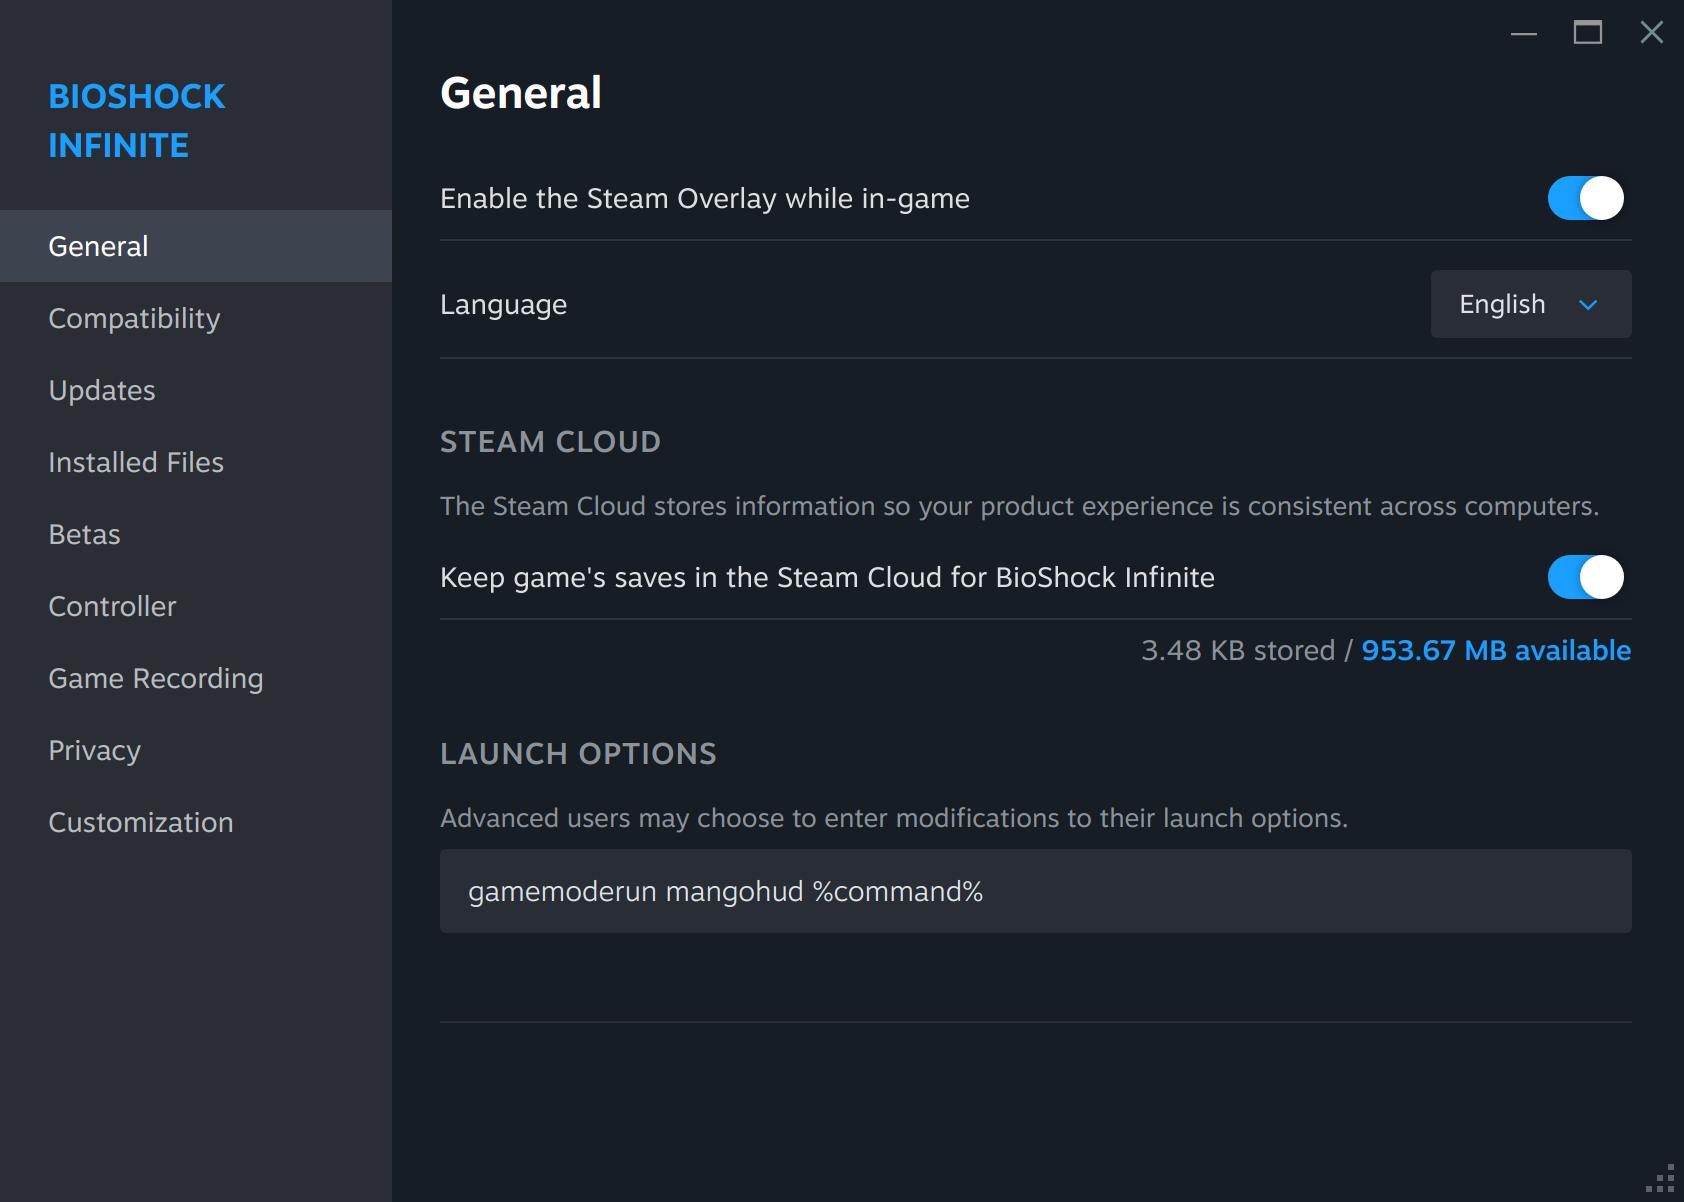
That’s it.
Steam will:
- Launch the game
- Preload MangoHud
- Inject the overlay
7.2 Proton Games (Steam Play)
Good news:
MangoHud works perfectly with Proton
No extra steps required.
If the game uses:
- Vulkan → native MangoHud
- OpenGL → still works
- DX11 / DX12 → works via DXVK / vkd3d
7.3 Environment Variable Method (Advanced)
If you like pain (or scripts):
MANGOHUD=1 mangohud %command%
Useful for:
- Custom launchers
- Debugging
- Wrapper scripts
8. MangoHud + GameMode (Best Friends)
MangoHud shows performance.
GameMode improves it.
They work beautifully together.
Steam launch option example:
gamemoderun mangohud %command%
Now you get:
- CPU governor scaling
- Scheduler tuning
- I/O priority boost
- Real-time performance data
9. Common Problems (And Why They’re Not Bugs)
9.1 “MangoHud Doesn’t Show Up”
Checklist:
- Game uses Vulkan/OpenGL
- Launch option is correct
- Config file has no syntax errors
Test again with:
mangohud glxgears
9.2 “FPS Is High But Game Feels Laggy”
Look at:
- Frame time spikes
- CPU core saturation
- Power throttling
This is exactly why MangoHud exists.
9.3 “Too Much Information!”
Then remove lines from the config.
MangoHud is modular.
No feature is mandatory.
10. How MangoHud Changes How You Tune Games
After a while, something interesting happens.
You stop guessing.
You stop saying:
- “I think it’s smoother”
- “Feels better maybe?”
And start saying:
- “Frame time variance dropped”
- “CPU thread 3 is pegged”
- “GPU is power-limited at 220W”
MangoHud doesn’t just show numbers.
11. Final Thoughts (And a Friendly Warning)
Once you start using MangoHud:
- You will notice bad ports immediately
- You will see when VSync lies to you
- You will understand bottlenecks instantly
And you may never enjoy ignorance again.
But that’s the price of knowledge.