

Introduction
Virtualization is an essential tool in today’s IT and development landscape, allowing users to run multiple operating systems on a single physical machine. VMware Fusion, designed specifically for macOS, enables users to run Windows, Linux, and other operating systems on a Mac seamlessly. Whether you're a developer, IT professional, or simply someone who needs to run multiple operating systems, VMware Fusion offers an intuitive way to create virtual machines (VMs) on a Mac.
In this blog post, we'll walk through the entire process of creating a new virtual machine in VMware Fusion, from installation to configuration, providing a comprehensive guide for both beginners and seasoned users.
1. What is VMware Fusion?
VMware Fusion is a desktop virtualization software developed by VMware, tailored for macOS users. It allows you to run various operating systems, including Windows, Linux, and other macOS versions, as virtual machines on your Mac. Fusion provides a seamless integration with macOS, allowing users to run applications from different operating systems simultaneously.
2. Features of VMware Fusion
Before diving into the process, let’s quickly look at some key features of VMware Fusion that make it a popular choice among Mac users:
- Cross-Platform Compatibility: You can run Windows, Linux, or macOS in a virtual environment without rebooting your Mac.
- Integration with macOS: VMware Fusion integrates tightly with macOS features such as Mission Control and Spotlight. You can even use Mac-specific shortcuts within your virtual machines.
- Snapshot and Clone Features: VMware Fusion allows you to take snapshots of your VM, so you can roll back to a previous state if something goes wrong. You can also clone VMs to create copies for different purposes.
- Unity Mode: This feature allows you to run Windows applications alongside macOS apps, blending the two environments together seamlessly.
- Graphics Acceleration: With support for DirectX and OpenGL, VMware Fusion can run graphically demanding applications in virtual machines.
3. Installing VMware Fusion
Step 1: Download VMware Fusion
- Visit the VMware Fusion website and download the version appropriate for your macOS. For comprehensive guidance on downloading Fusion or any other VMware software, kindly refer to this post.
- VMware offers two versions:
- VMware Fusion: Designed for casual users who need to run a second OS.
- VMware Fusion Pro: Includes advanced features for IT professionals and developers.
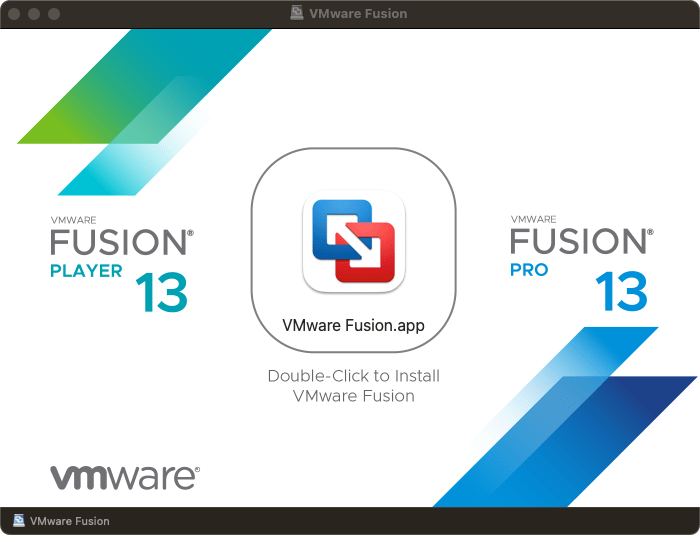
Step 2: Install VMware Fusion
- After downloading the installer, locate the
.dmgfile in your Downloads folder and double-click to mount it. - Inside the mounted image, double-click the VMware Fusion icon to begin the installation.
- Follow the on-screen instructions. You may be prompted to enter your Mac’s administrator password to authorize the installation.
- Once installed, you can open VMware Fusion from your Applications folder.
4. Creating a New Virtual Machine in VMware Fusion
Now that you’ve installed VMware Fusion, let’s walk through the steps to create a new virtual machine. In this example, we’ll be setting up a Windows virtual machine, but the steps are similar for other operating systems like Linux.
Step 1: Launch VMware Fusion
- Open VMware Fusion from the Applications folder or via Spotlight search (
Cmd + Space, then type "VMware Fusion"). - When you open it for the first time, you may see a prompt to install additional tools or to allow certain permissions, such as accessibility features. Follow these prompts to ensure everything is set up correctly.
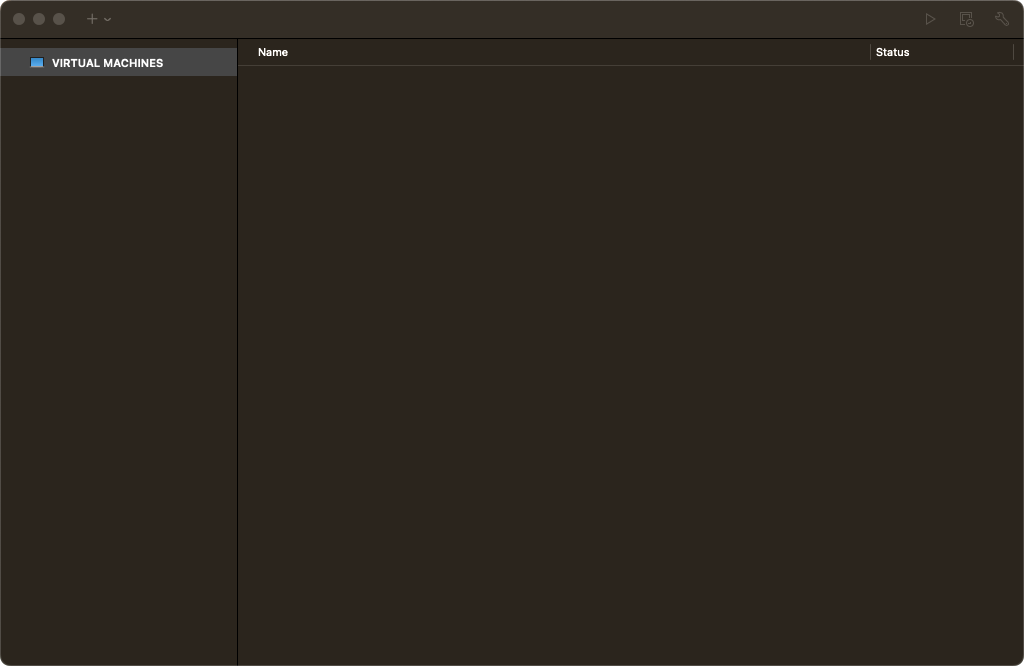
Step 2: Select "Create a New Virtual Machine"
- Upon launch, you’ll be greeted with the VMware Fusion home screen.
- Click the "+":
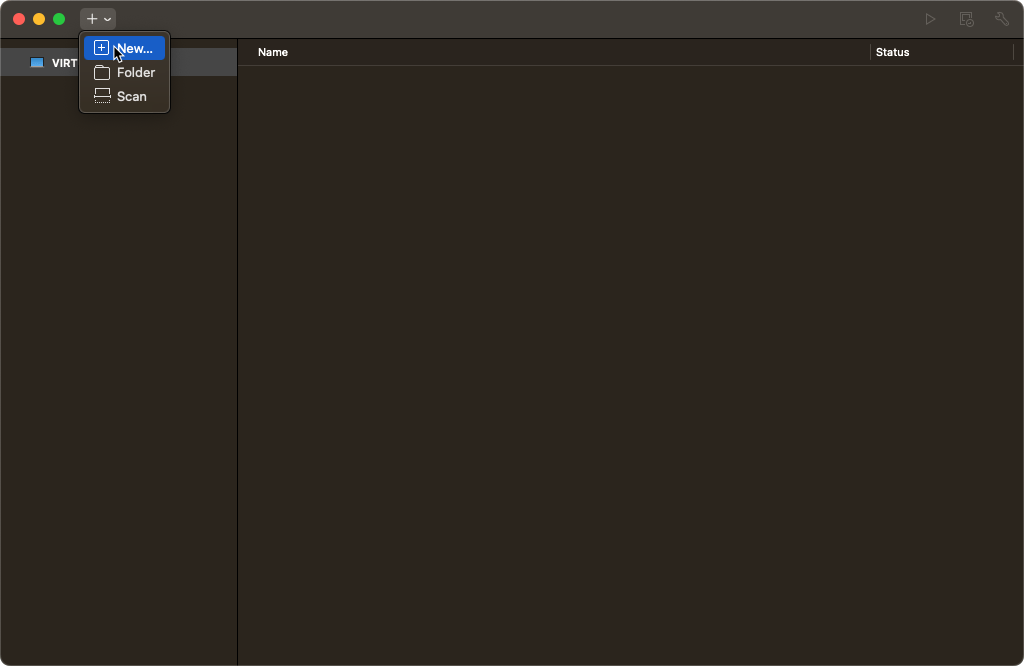
- And then click the "Create a New Virtual Machine" option in the center of the screen.
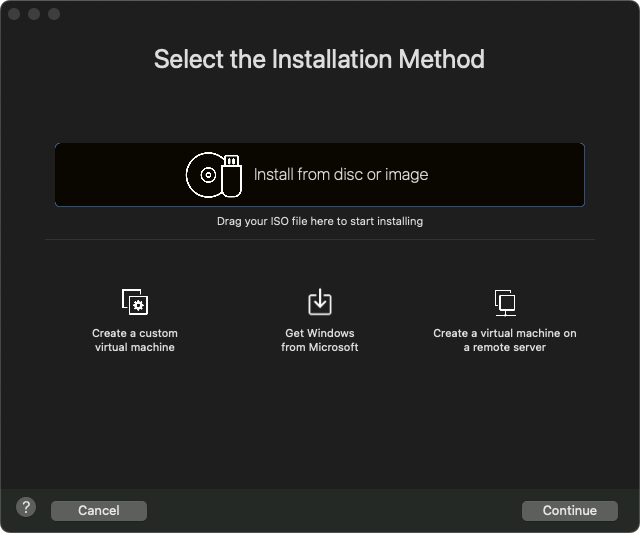
Step 3: Choose an Installation Method
VMware Fusion offers multiple ways to install an operating system on a virtual machine:
- Install from Disc or Image: This is the most common method, where you can install an OS from a physical disc or an ISO file.
- Migrate from PC: This option allows you to migrate an existing physical PC to a virtual machine.
- Import from Another Virtualization Platform: You can import virtual machines from other platforms like VirtualBox or Parallels.
- Use macOS Recovery: This option installs macOS directly from the recovery partition of your Mac.
In this guide, we’ll focus on Install from Disc or Image.
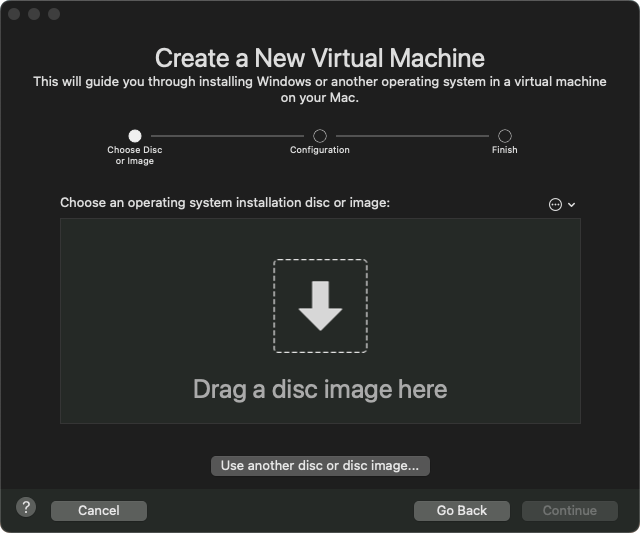
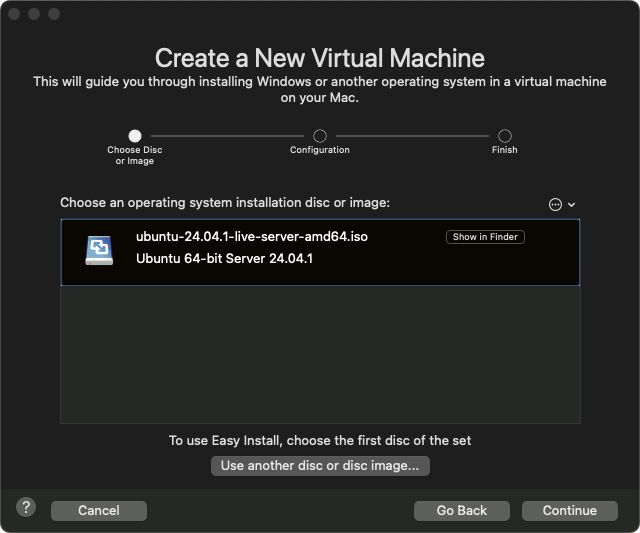
Step 4: Select the Installation Media
- If you're installing from a physical disc, insert it into your Mac’s optical drive or an external USB drive. If you're using an ISO file, click "Use another disc or disc image…" and select your ISO file from your computer.
- VMware Fusion will automatically detect the OS and display the details. For example, if you select a Windows 10 ISO, it will show "Windows 10" as the detected OS.
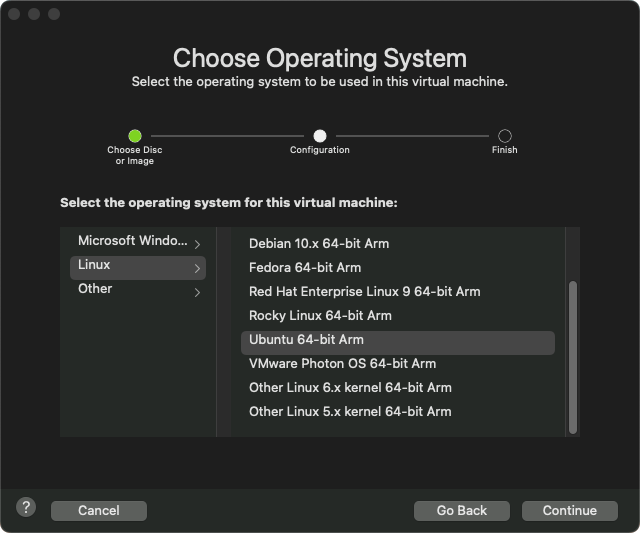
Step 5: Choose the Operating System
- After selecting the installation media, VMware Fusion will prompt you to choose the operating system. It usually auto-detects the correct OS based on your ISO or disc, but you can manually select it from the list if needed.
- Click Continue once you've confirmed the OS type.
Step 6: Configure Your Virtual Machine Settings
- Easy Install: VMware Fusion offers an Easy Install feature that automates much of the installation process. You’ll be prompted to enter:
- Your operating system's license key (for Windows).
- A username and password.
- Other setup options such as Windows version or language.
- Manual Install: Alternatively, you can opt to install the operating system manually. In this case, you will go through the typical OS installation process.
I'm using a MacBook with an M1 processor, which only allows me to install the ARM version of Ubuntu.
Step 7: Customize Virtual Machine Hardware Settings
Once you’ve selected your installation method, you can customize the virtual machine’s hardware settings:
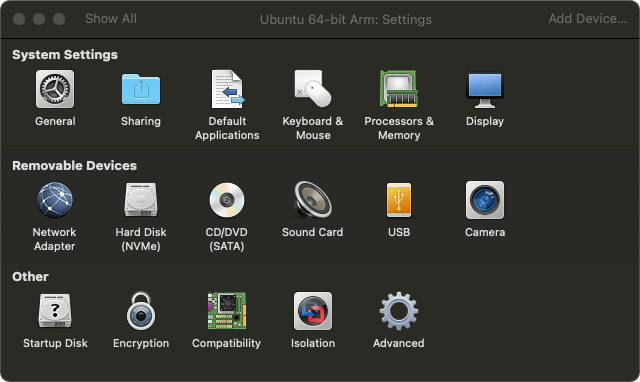
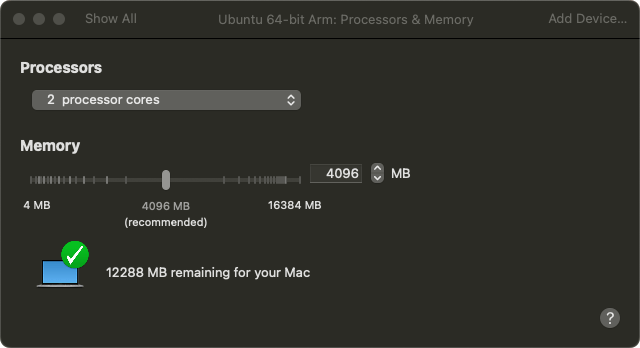
- CPU and Memory: By default, VMware Fusion allocates a single CPU core and a small amount of memory. You can increase these values based on your Mac’s hardware. Typically, 2-4 cores and at least 4 GB of RAM are recommended for modern operating systems.
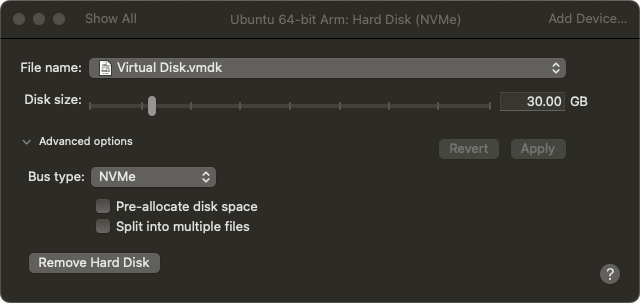
- Hard Disk Size: Choose how much disk space to allocate to the virtual machine. The default is usually 60 GB, but you can increase or decrease this based on your needs.
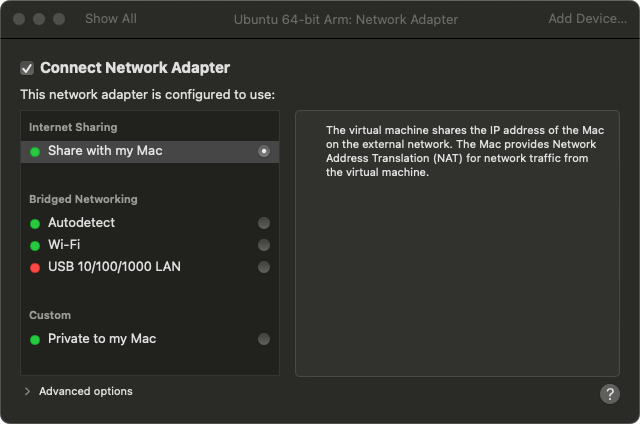
- Networking: Choose between bridged, NAT, or host-only networking. NAT (Network Address Translation) is the default and works for most users, allowing the virtual machine to share your Mac’s network connection.
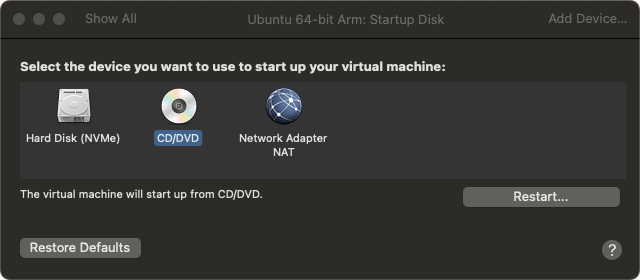
- The key parameter in the installation process is to select the CD/DVD Drive as the primary boot option.
Step 8: Install VMware Tools (Optional but Recommended)
- Once your OS installation is complete and your virtual machine is running, it’s highly recommended to install VMware Tools.
- VMware Tools improves the integration between the guest OS and macOS, providing better performance, enabling features like drag-and-drop between systems, and improving display resolution.
- To install VMware Tools:
- In the menu bar, click Virtual Machine > Install VMware Tools.
- Follow the prompts inside the guest operating system to install the tools and restart the VM when finished.
Screenshot Placeholder: Installing VMware Tools
5. Managing Your Virtual Machine
Once you’ve set up your VM, you can manage it in several ways:
- Snapshots: Take snapshots of the VM state before making significant changes, allowing you to revert back if something goes wrong.
- Cloning: Clone the VM to create duplicates for testing different setups without affecting the original.
- Unity Mode: For Windows VMs, you can run Windows applications side by side with macOS apps using Unity Mode.
Conclusion
Creating a new virtual machine in VMware Fusion is a straightforward process, but its real power lies in the flexibility and control it offers. Whether you're running Windows, Linux, or macOS, VMware Fusion provides an easy-to-use and powerful virtualization platform on macOS. With features like snapshots, seamless OS integration, and hardware customization, VMware Fusion is a fantastic choice for developers, IT professionals, and anyone who needs to run multiple operating systems.
With this step-by-step guide, you should be able to get your virtual machine up and running in no time. Happy virtualizing!